The Media Uploader window should be familiar to you at this point in the book. You saw it when setting the Featured Image of a Post and again when inserting an image into the content of the Post. So clearly this window does a number of tasks, and in this lesson you walk through some of the key ones.
Begin by refreshing your memory with Figure 1, which shows the Media Uploader window in its Insert Media mode.
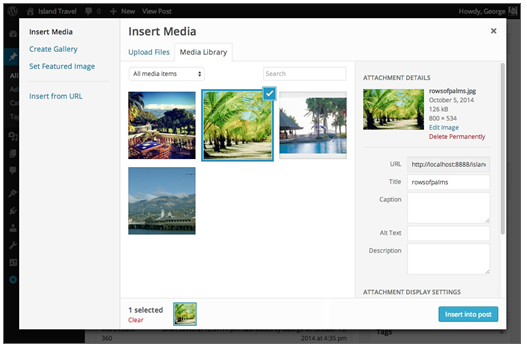
FIGURE 1
It’s a pop-up window with the current admin screen grayed out behind it. In other words, it’s not an admin screen itself or a new tab in your browser. That means you have to do something before returning to the admin screen, even if that’s just to cancel out the window by clicking the X at the top right.
When you open the Media Uploader window, it shows you only what you need based on the button or link you used to open it.
If you clicked Set Featured Image, there is only one task you can perform: set the featured image. But if you clicked the Add Media button, the window shows the Insert Media function with a menu on the left side to switch functions, including Set Featured Image. This can be a bit confusing because people sometimes think these are different windows, but all versions of it are referred to as the Media Uploader window.
When you click Add Media, the window has a menu on the left side, as shown in Figure 2 A. In mobile mode, the menu is a drop-down at the top, as shown in Figure 2 B.
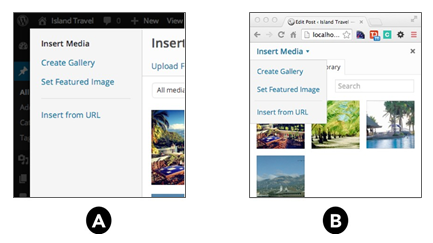
FIGURE 2
The four most common operations for the Media Uploader are:
- Insert Media
- Create Gallery
- Set Featured Image
- Insert from URL
There are two other operations: Create Audio Playlist and Create Video Playlist. But these appear only if there is at least one file of that type in the Media Library, and are covered in Lesson 16, “Adding Video and Audio.”
The main four operations are discussed individually, but first consider one element of the user interface that applies to all.
The big blue button for taking action is always at the bottom right, and it remains inactive—you can’t click it—until you make a choice or enter some information. You know the button is inactive because its colors are muted. As soon as you make a choice or enter information, the button lights up and you can click it.
1. Insert Media
This is the most commonly used function of the Media Uploader: putting media into the content of Posts and Pages. It consists of two tabs: Upload Files and Media Library. As soon as you have at least one file in the Media Library, the default state of the Insert Media screen is to show the Media Library, as highlighted in Figure 3.

FIGURE 3
By default the Media Library tab shows all files in the library, but you can filter results by using the drop-down or the search function, as shown in Figure 4.
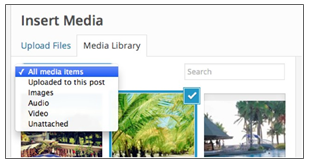
FIGURE 4
Unlike the Media Library admin screen, this Media Library area does not allow for filtering files by date. However, the ability to show only files that have been uploaded to the current Post is handy.
Whenever you upload a file while on a particular Post or Page, WordPress records that the file is “attached” to it. The file is still part of the Media Library and can be used on other Posts or Pages, but there’s a special relationship to that original content. You can make use of that relationship here by filtering out all other files and showing only the ones you uploaded to this Post.
From the Media Library results, you can insert one or more media files at a time by clicking the files you want. You can verify what’s going to be inserted by looking for a check mark on the thumbnail (or icon for non-images) and whether the file shows up in the Attachment Details area on the right, as shown in Figure 5.
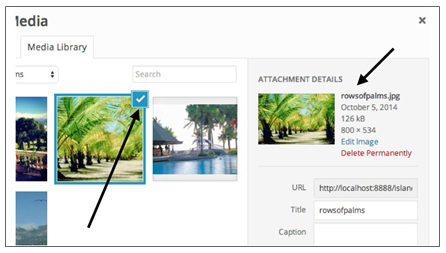
FIGURE 5
But if you’re uploading several files, they can’t all show up on the right side, and if you have more than a few files in your library, they won’t all show up at the same time within the window to see if they’re checked. So how do you remember which ones you’ve selected? By looking at the little Selected area at the bottom of the window, as shown in Figure 6.
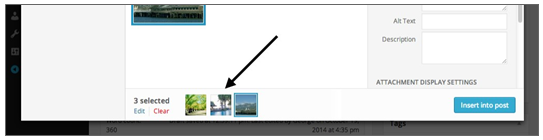
FIGURE 6
With images you have a tiny thumbnail and with other files you have an icon.
After you finish selecting, of course, you can click the Insert into Post button at the lower right. But before you do, in particular with images, it’s important to check the Attachment Details.
On the right side of the Media Uploader, there’s a gray section called Attachment Details, where you can find all of a file’s details when you select it, as shown in Figure 7.

FIGURE 7
The unfortunate fact is that unless you have a tall screen, you don’t see all the Attachment Details. Some of the most important information has to be accessed by scrolling, as shown in Figure 8.
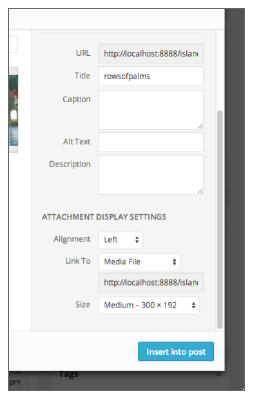
FIGURE 8
So always remember to scroll down and check all details before inserting a file into your content.
In mobile mode, the situation with the Attachment Details presents a slightly different issue. When you click an image, the details box slides out from the right, as shown in Figure 9 A.
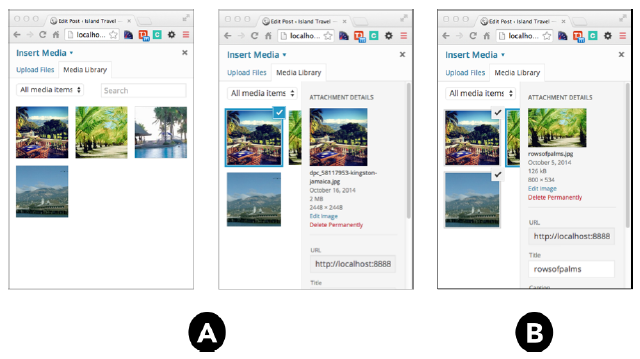
FIGURE 9
If you click the image again, the details slide back out of sight. But if the image you clicked was covered by the details box, you need to click a different image to make the box disappear. That’s not such a big deal, but if you try to select multiple images, the Attachment Details remain in place, covering some of your images, as shown in Figure 9 B.
The Attachment Details area has three main functions:
- List the file specifications—Date uploaded, size, and so on.
- Manage meta data for the image—Title, caption, alternative
- Settings for displaying the file—Alignment and so on.
1.1. File Specifications
Here you can find a variety of file specifications, depending on the type of file. For images you get details like those shown in Figure 10.
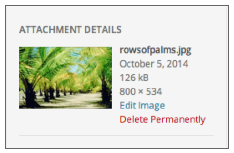
FIGURE 10
Knowing the dimensions of the image you uploaded can be important, for example, in deciding if the full-sized version will suit a particular place in your content. Those dimensions also give you a sense of what smaller versions
WordPress would have created automatically (an image that’s only 125 pixels wide has no smaller versions, whereas one that’s 1,200 pixels wide will have a Thumbnail, Medium, and Large version.
The file size specifications are also helpful in spotting images that are unnecessarily large (for example, a 1.5 MB image is far too big a file size) or deciding which of two versions of a PDF you accidentally uploaded is the one you optimized for the web.
When you do come across a file that should be deleted, there’s a handy Delete Permanently link. And when it says permanently, that means the file does not go to the Trash with the possibility of restoring it later.
If you want to edit an image after uploading it, there’s also an Edit Image link, and which is discussed in Lesson 14, “Using the WordPress Image Editor.”
1.2. Attachment Meta Data
In the middle area of Attachment Details, you have the opportunity to add and modify several types of metadata about the file, as highlighted in Figure 11.
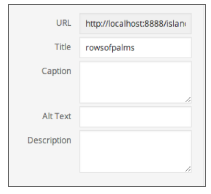
FIGURE 11
Following are the four options for metadata:
- Change the file Title (by default its filename)
- Caption
- Alternative (Alt) Text (for images)
- A Description
The file Title is an HTML attribute that is used as a kind of tooltip when you mouseover the file (whether linked or not).
While WordPress automatically fills this field with the file’s name, changing it does not change the filename.
Captions are used mostly for images but are available for use with other file types. How (and even, if) captions display depends on your Theme.
Alternative or Alt Text was originally devised for web reader programs used by the visually impaired so that images could have a short description. However, it’s also important for helping search engines understand what your image is about.
The Description displays on the Attachment Page. Every media file you upload to WordPress automatically has a web page assigned to it, which is known as the Attachment Page. As you’ll see in the next section, this is one of your choices when deciding whether to link a media file or not. The Description may also be used in other situations, depending on your Theme.
1.3. Display Settings
This is one of the most-used sections of Attachment Details, but for browsers on most devices, it remains entirely or partially hidden, and you have to scroll to see the settings. Settings for an image are shown in Figure 12.
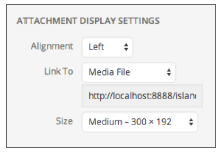
FIGURE 12
Up to three settings are found here, depending on the file type:
- Alignment (for images) relative to the surrounding text
- Whether, and to what, the file is being linked
- Which size (of image) is to display
Alignment means whether an image floats to the left or right of the surrounding text or whether it sits on its own line, either to the default left or centered in the content area.
Linking is a choice that’s available for all files; though again it varies with the type. In Figure 13 you can see the choices for images, documents, and video/audio files.
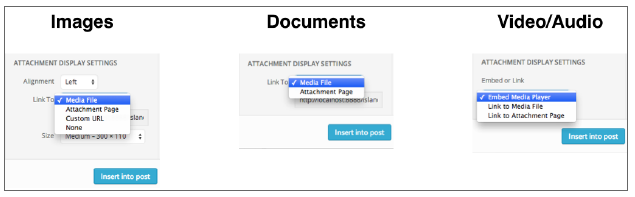
FIGURE 13
Attachment Pages were mentioned earlier, and these are complete web pages, with your header, footer, and so on, and the file and its description showing in the content area.
Linking to Media File is going be the usual choice for non-image files because you want visitors to download or play them, although you may want visitors to go to the Attachment Page and get more details before downloading or playing.
In most cases for images, I would recommend the None setting for Link To. It can be confusing for visitors to click an image and be taken to an Attachment Page—even more so if you choose Media File, because they’ll simply see the full-size image in a blank browser window.
However, plugins that create pop-up lightbox effects from images typically need you to link to Media File, so watch for that.
The final choice for images under Display Settings is the size of image to be inserted. What options you have depend on the dimensions of the original image. If the original were smaller than WordPress’s Thumbnail setting, you’ll have only the choice of inserting the full-sized image. With large originals, you have a choice of Thumbnail, Medium, and Large.
2. Create Gallery
A WordPress Gallery is a collection of images that automatically is formatted through your Theme. By default, the Thumbnail versions of the images display, and on the Island Travel site look like Figure 14.
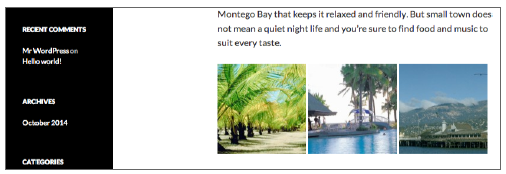
FIGURE 14
Galleries are created and managed through the Media Uploader window. Exactly how the screen looks for Galleries depends on the function you perform, but the Create Gallery link on the left menu produces the screen shown in Figure 15.
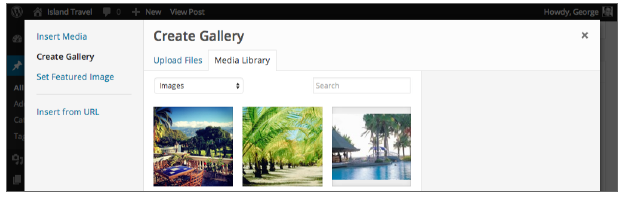
FIGURE 15
In Lesson 15 I’ll walk you through the entire process of creating and managing a Gallery, but for the moment let me just say that it begins very much like choosing a group of images to insert into a Post. You click on each image you want and a checkmark is displayed to indicate your choices.
3. Set Featured Image
This link produces the same screen (Figure 16) you would get if you click the Set Featured Image link in the Featured Image meta box of a Post or a Page.
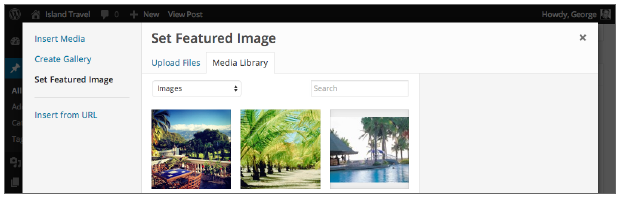
FIGURE 16
Although it’s similar to the Insert Media version of the screen, there are two important differences:
- You can choose only one image.
- There are no display settings; your Theme determines where and how the Featured Image displays.
Remember that a Featured Image is not inserted by Themes into the actual content of a Post. Although commonly these days, it displays somewhere near the top of a Post.
If your Theme does not use the Featured Image when displaying the full version of a Post (most use it when displaying lists of Posts), you could separately insert that image into the body of the Post.
4. Insert From Url
To insert a media file into a Post or a Page, it does not have to be uploaded to WordPress. It could reside on a server separate from your website. For example, a manufacturer you deal with might have an image on its website that it allows you to link to. Or you might have a PDF for downloading that you store in a cloud account.
In cases like that you would use the Insert From URL link in the menu of the Media Uploader, as shown in Figure 17.
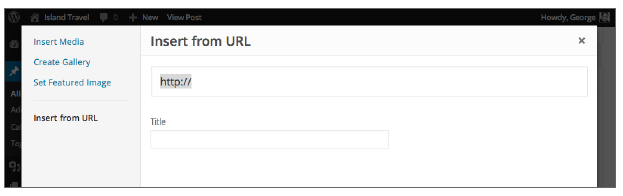
FIGURE 17
The first step is to enter the full URL for the file. Make sure the http:// is at the beginning. Give it a moment for WordPress to find the file to determine what type it is. If it’s an image, for example, you’ll see the image displayed along with various settings, as shown in Figure 18.

FIGURE 18
If you’re linking to a video or audio file, WordPress displays it in a player if the connection is successful.
For a document such as a PDF, WordPress simply verifies that it exists (you’ll see a spinning circle to the right of the URL); then you can enter the Title, which is the text to which the document is linked in your content.