Now, we will create a logo for our store. Our logo will be an identity of our store. We will create a simple logo for our project ‘shops’. As this is our first time working with GIMP, we will see a step-by-step guide for creating a logo with GIMP.
1. How to do it…
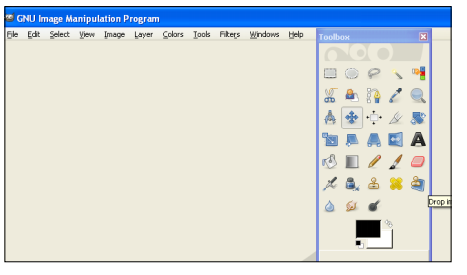
- We need to open GIMP. Go to Start | All Programs | GIMP | GIMP 2 or Application | Graphics | GIMP.
The default window of GIMP is shown.
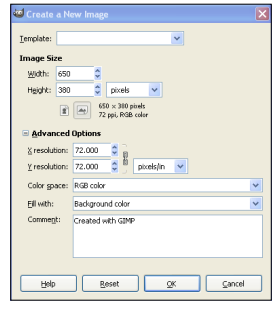
- To create a new image, we will go to File | New of We can use Ctrl+N as the shortcut option for creating a new image. The following window will be open.
Let’s discuss every option:
-
- Template: There is a drop-down list for some defined templates. These templates are some of the common useful images that we frequently need for our development. You can see some defined height and width are given in this By choosing this option, we can set the height and width of our image. If we choose an option from the drop down, then the height and width section below the template will be populated automatically. We can also leave this option blank and can set height and width of our images manually. In our case, we will leave this blank.
- Image size: Here, we can set the height and width of the The sizes can be set in different units. In the height and width textbox, we can type in the values, and we can also adjust those values with the up and down arrows in the respective textboxes. Our logo will have a height of 43px and a width of 210px.
- Units: There are many units available in GIMP for image creation. We can select our chosen units from the drop You can also see a More… link below the drop down. There, we can find more unit options that are available for our use.
- Portrait/Landscape: Under the size section, there is an option to select for portrait/landscape. When portrait is selected, the height is larger than the If we select landscape, the width will be greater than the height.
- X resolution: We can set the X resolution for our image here with the proper We will leave this as it is. The link icon lies besides the x and y resolution. When the link is connected, and you make a change in one textbox, the other will automatically change. If we unlink it, then making a change in one will not affect the other one.
- Y resolution: We can also set the Y resolution for our image here with the proper unit. We will leave this field as it is.
-
- Unit: This unit is for There is a wide variety of units available for this option. Also, there is a More… link. So, we can choose more units. We will leave this field as it is.
- Color space: We can choose RGB or Grayscale as our color space. We will select RGB.
- Fill with: This will be our fill up option. We will select Transparency to create transparent images. There is also an option for setting background colours with the background option.
- Comment: Here, we can write comments describing our image.
- Click OK.
- Our image area is small to view, so let’s zoom For that we will go to View | Zoom. Here, you will see the following window:
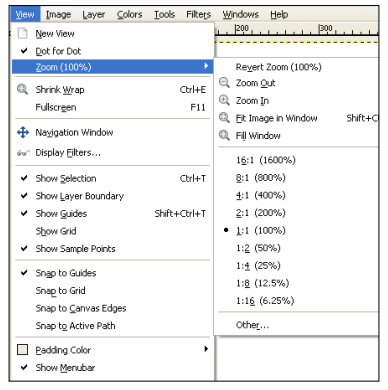
This shows options for:
-
- Zoom in
- Zoom out
- Fit Image in Window
- Fill Window
- Different ratios for zoom
- Custom ratios
- We will set the zoom to 2:1 (200%) Alternatively, we can click the zoom tool on the toolbox. Then, clicking on the image will zoom in and Ctrl+click will zoom out. So, our image area becomes like this:

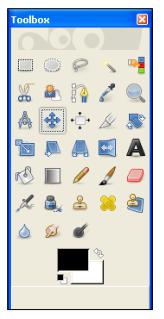
- Then, we will write something for our Click on the A or Text Tool on the Toolbox, or you can go to Tools | Text. At the bottom of the toolbox, we will see the control panel for texts. Let’s discuss the options:
-
- Font: Here, we can select fonts from a wide range of Clicking on the button, will show the available options for text. We will choose Lucida Calligraphy Italic.
- Size: Select the appropriate size and size The size will be 36px.
- There are hinting, force auto-hinting, and anti-aliasing
- Color: We will select #1b931b for our
- Justify: There is left-justify, right-justify, centered, and filled We can also set indentation, letter-spacing, and line-spacing. We will choose left-justify, letter-spacing for 0.1px, line-spacing is 2px, indentation 1px.
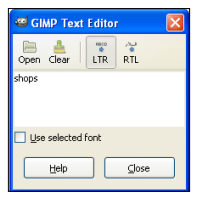
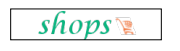
- Now, select an area, a window will open up for text input; write our project title shops as shown in the following screenshot:
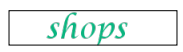
- We will select Use selected text on the Now, our logo is at this stage:
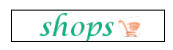
- We will find an appropriate image of a shopping cart from the
- We will use it as a layer with our existing Go to File | Open as Layers. Then, choose the downloaded shopping cart image. Now, select open. Our image will be like this:

- Now, we will select the ‘move’ tool from the
- Then, select the cart layer and move it to the right-hand
![]()
- There is the scale tool, the perspective tool, the shear tool, and the flip We are now going to discuss them one by one:
- Scale tool: Using the scale tool, we can resize an image to proper We can see the control panel for scale at the bottom of the toolbox.
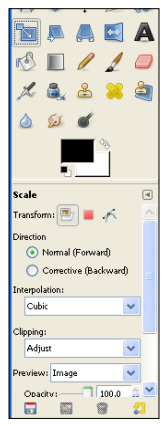
Let’s discuss the options:
-
- Transform: This shows which options we want to
- Direction: Normal or corrective options are
- Interpolation: There are none, linear, cubic, and sinc options for
- Clipping: We can set clip option to adjust, clip, crop to result, and crop with
- Preview: We can preview as image, grid, image + grid, and
- Opacity: We will control opacity with this
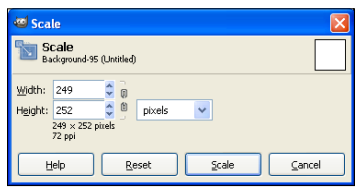
- To use scale, click and hold mouse on the image area that you want to scale and then drag the mouse in the direction to which you want to scale the image. We scale our image to a smaller one to adjust it with our logo. When we drag our mouse, there is another window displaying x and y We can manually set our values there too.
Our logo will be like this by this time:
![]()
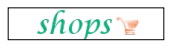
- Shear tool: We can change the magnitude of our image with the shear tool. By clicking the shear icon in the toolbox, we can see its control panel at the bottom of the Shear tool has the same attributes as the scale tool. Now, our logo will look like this:
- Perspective tool: This is an excellent tool for image modification. We can change our image at any After selecting this tool, when you click on the image, you will see four boxes on the four corners of our image and a circle at the centre. We can drag any of those corners to any extent. There will be a window showing the transformation matrix. At this point in time, our logo is at this stage:
- Now, we will use the ‘smudge’ tool. This will help us to smudge a portion selectable with a brush. Click the ‘smudge’ icon on the toolbox, then, we will move by clicking and holding the mouse on our We can also select this option with the key s or by going to Tools | Paint Tools options. So, we will get this kind of effect on our logo:
We see the control panel for the smudge option at the bottom of the toolbox. Let’s discuss the options:
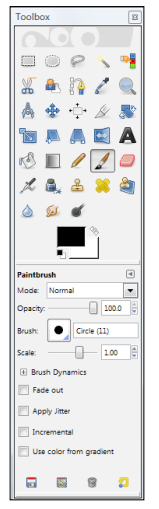
- Mode: There are different options for selecting We will use normal.
- Opacity: This option sets the opacity of the We can set it manually or by using mouse on the roller. We will set the opacity to 20.
- Brush: We have different kind of brushes available in Click on the button beside the brush. It will open up a window showing all the brushes. We can change the view of brushes to grid, list, and also zoom in or zoom out. We see the name of each brush beside its image.
- Scale: This option sets the scale option of the smudge We can set it manually or by using mouse on the roller. We will set the opacity to 0.17.
- Brush dynamics: We can set some dynamic options of brushes There are pressure, velocity, hardness, and rate.
- Fade out: We will set the length and unit for fade out selection.
- Apply jitter: This option sets the jitter option of the smudge We can set it manually or by using the mouse scroller. We will set the opacity to 2.81.
- Hard edge: We set the hardness of the edge option of the smudge We can set it manually or by using mouse on the roller. We will set the opacity to 50.0.
GIMP comes with different useful plugins. We need the ‘export’ plugin to save as a png file. We can get the plugin from http://registry.gimp.org/node/33. There is one for Windows and one for Linux. You can download the one that you need. We will download it for Windows, and extract the files. There are three files:
⯈ Exe file: plug-in file.
⯈ Readme file: it contains necessary information for installation.
⯈ License file
We will copy and paste the exe file in to our GIMP install directory: E:\install\GIMP-2.0\ lib\gimp\2.0\plug-ins. Then, restart GIMP.
Now, we will save our logo. Go to File | Save as, then the following window will open:
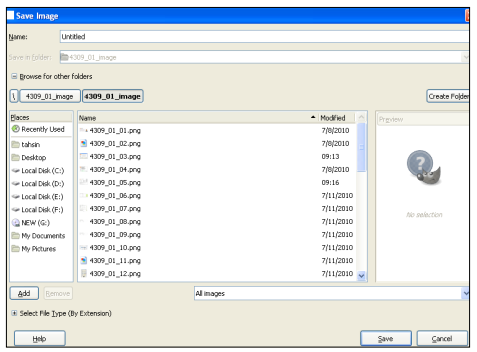
Let’s discuss every field:
⯈ Name: We will set the file name here. We can also set the extension optionally.
⯈ Save in folder: The saving directory can be chosen here.
⯈ Browse for other folder: We can choose our saving directory more clearly here. We can create a new folder too.
⯈ Select file type: We will select the file extension type using this tool.
Then, we will click the save button.
2. There’s more …
There are other designing tools that will be helpful. They are:
⯈ Photoshop
⯈ Fireworks
Definitely Photoshop is a very good tool for developers as it has many features in it. But we have gone for GIMP as it is open source. And also, GIMP is enriched with many features. There are many plugins for GIMP.
Another one is Fireworks. This is also a good option for designing.
2.1. Firebug
For our development, we need to install some Firefox add-ons. Firebug is one of them. Firebug is a very helpful tool for developers. We can inspect HTML and modify style and layout in
real-time. It uses the most advanced JavaScript debugger available for any browser. With it, we can examine detailed measurements of our site’s network activity. First, let’s see how to install Firebug.
We need to go to this website to add the Firebug addon: https://addons.mozilla.org/ en-US/firefox/addon/1843/. There is a button that says Add to Firefox. Current version works with Firefox 3.5 to 3.6.*. Click on the Add to Firefox button to add it. The following window will appear:
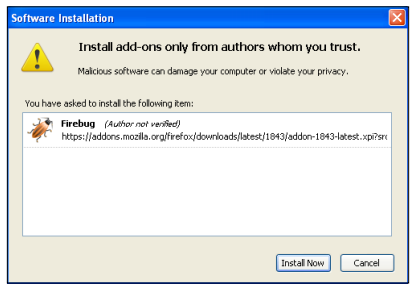
Wait until you see an Install Now button. Clicking the button will install Firebug, now we need to restart Firefox. Firefox now has a Firebug button at the bottom of the browser window.

Source: Hasan Tahsin (2011), OpenCart 1.4 Template Design Cookbook, Packt Publishing.