We have set the general information; now, we will set store-specific information. Let’s see this recipe now.
1. Getting started
To change store settings, we need to log in to our admin panel. We will use our previously saved admin username and password for login.
2. How to do it…
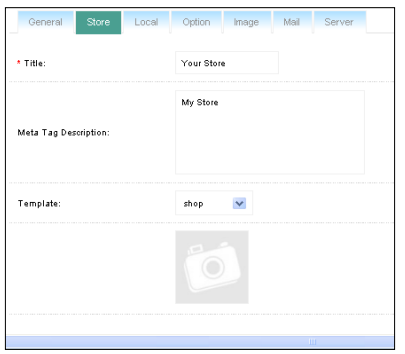
We will click the Store tab under System | Settings section. The following window will open:

Let’s discuss them:
⯈ Title: Our store’s title will be set here. This title will be set for our home page. We will set it as ‘shop’.
⯈ Meta Tag Description: For search engine optimization, we will set appropriate Meta tag description in this field.
⯈ Template: We can change the template of our site through this drop-down box. Currently, it will show our default template. When we add new templates, they will be shown here.
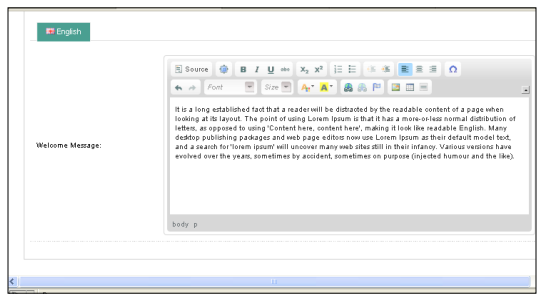
⯈ Welcome Message: We will write a welcome message for our customers using this text area. For example, we will write a dummy text from ‘lorem ipsum’. To take some dummy text, go to the URL http://www.lipsum.com/. We have our dummy text, that we will now paste in the text area. This message will appear on the home page of our store. We have different controls for this field. So, we can format our text as and when necessary using those tools.

We have different controls for this field. So, we can format our text as we like using those tools.
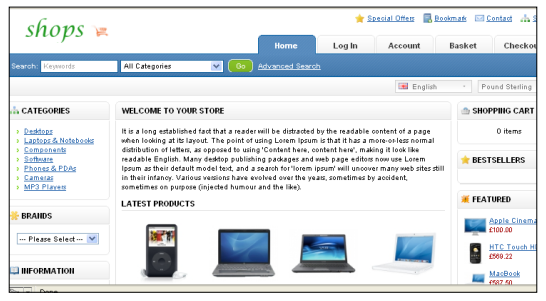
Finally, we will save it as we have done before using the Save button on the top right side. Now, we will go to the store front to view the changes:

Here, in the above picture, we can are see our dummy welcome messages.
Source: Hasan Tahsin (2011), OpenCart 1.4 Template Design Cookbook, Packt Publishing.
