To access MongoDB from a Java application we need to create a Maven project in Eclipse IDE and add the required dependencies.
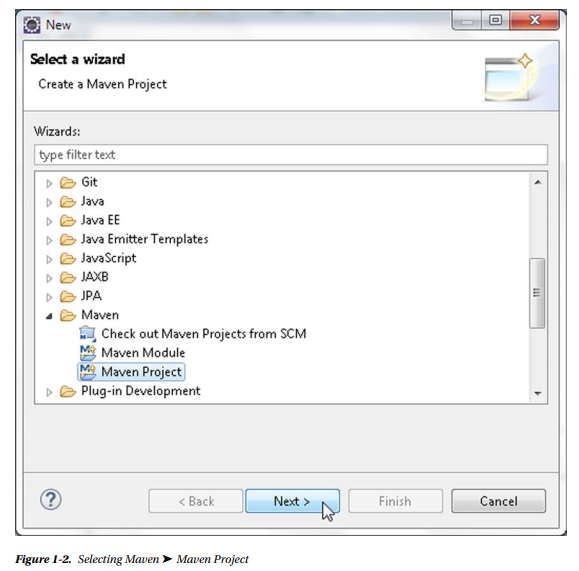
- Select File ► New ► Other. In the New window, select the Maven ► Maven Project wizard and click on Next as shown in Figure 1-2.
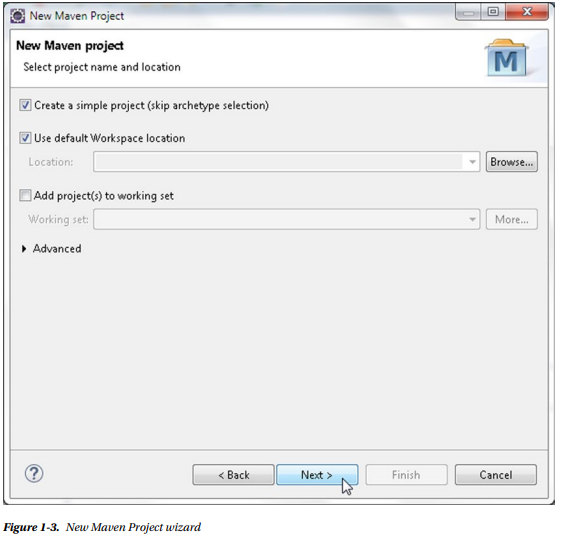
- In New Maven Project wizard select the check boxes “Create a simple project” and “Use default Workspace location” as shown in Figure 1-3. Click on Next.
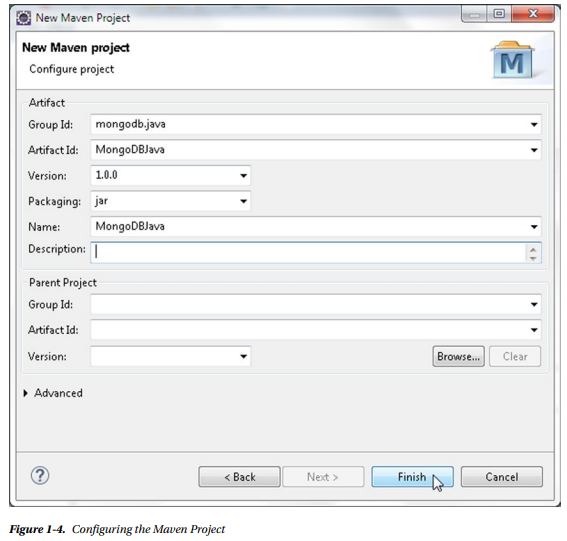
- Next, configure the project, specifying the following values as shown in Figure 1-4 and then clicking on Finish:
-
- Group Id: mongodb.java
- Artifact Id: MongoDBJava
- Version: 1.0.0
- Packaging: jar
- Name: MongoDBJava
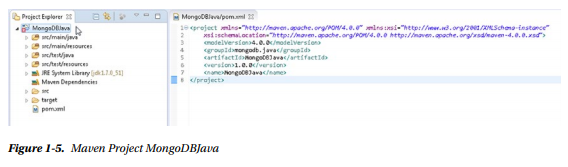
A new Maven project gets created as shown in Figure 1-5.
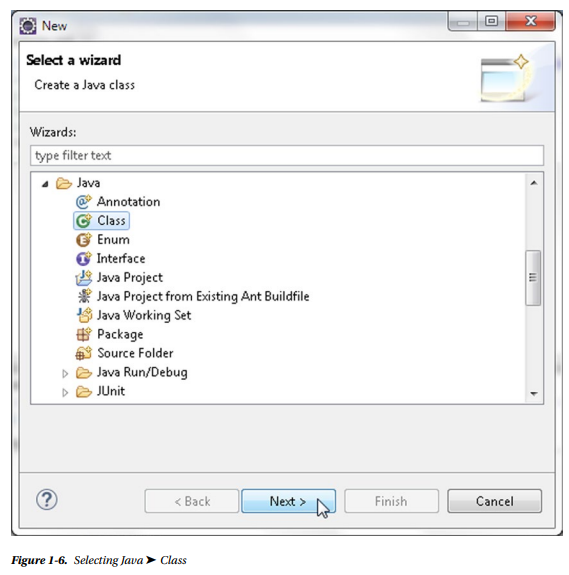
- We need to add some Java classes to the Maven project to run CRUD operations on MongoDB server. Select File ► New ► Other, and in the New window, select Java ► Class as shown in Figure 1-6.
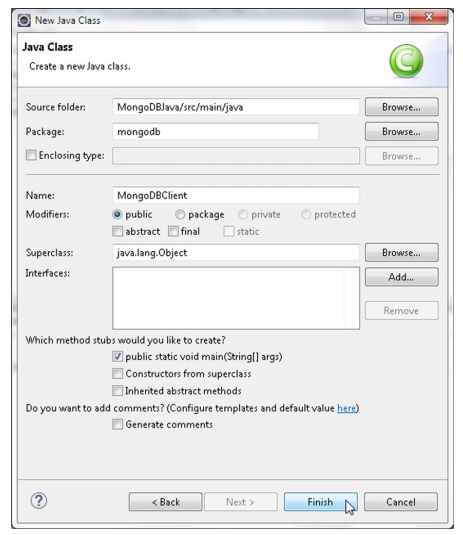
- In New Java Class wizard the Source folder is preselected as MongoDBJava/src/ main/java. Specify a Package name (mongodb). Specify a class Name (for example, MongoDBClient for the application to connect to MongoDB and get data). Select the public static void main (String[] args) method stub to create the class and click on Finish as shown in Figure 1-7.
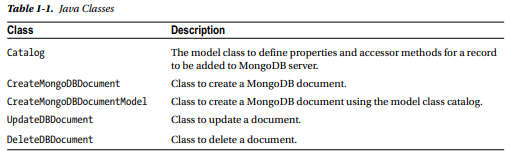
- The MongoDBClient class gets created in the MongoDBJava project. Similarly add the Java classes listed in Table 1-1 to the same package as the MongoDBClient class: the mongodb package.
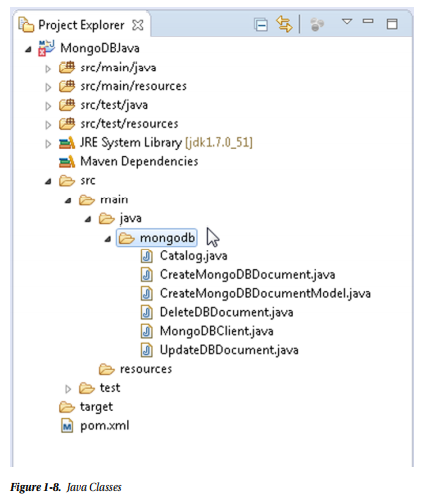
The Java classes in the Maven project are shown in the Package Explorer in Figure 1-8.
- Next, configure the Maven project by adding the required dependencies to the pom.xml configuration file. Add the Java MongoDB Driver dependency to the pom.xml. The pom.xml is listed below. Click on File ► Save All to save the pom.xml.
<project xmlns=”http://maven.apache.org/POM/4.0.0″
xmlns:xsi=”http://www.w3.org/2001/XMLSchema-instance”
xsi:schemaLocation=”http://maven.apache.org/POM/4.0.0
http://maven.apache.org/xsd/maven-4.0.0.xsd”>
<modelVersion>4.0.0</modelVersion>
<groupId>mongodb.java</groupId>
<artifactId>MongoDBJava</artifactId>
<version>1.0.0</version>
<name>MongoDBJava</name>
<dependencies>
<dependency>
<groupId>org.mongodb</groupId>
<artifactId>mongo-java-driver</artifactId>
<version>3.0.3</version>
</dependency>
</dependencies>
</project>
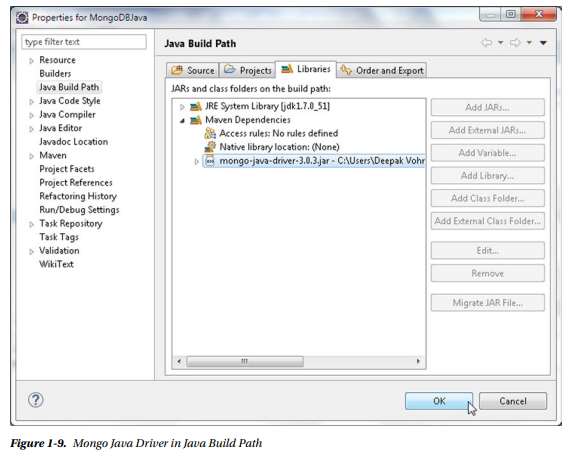
- Right-click on the project node in Package Explorer and select Project Properties. In Properties select Java Build Path. Select the Libraries tab and click on Maven Dependencies to expand the node. The MongoDB Java driver should be listed in the Java Build Path as shown in Figure 1-9. Click on OK.
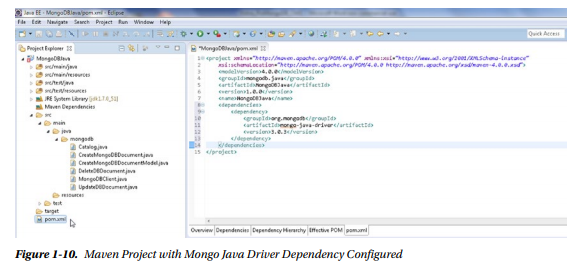
The Maven project with the Mongo Java driver dependency configured in pom.xml is shown in Figure 1-10. The directory structure of the MongoDBJava Maven project is shown in the Package Explorer.
Source: Vohra Deepak (2015), Pro MongoDB™ Development, Apress; 1st ed. edition.