1. What Is a WordPress Importer?
An importer is a WordPress tool, used to migrate content from an already existing WordPress site to another. You can also use this tool to move a site from your localhost to an online server.
You can migrate different data with the WordPress importer. For example:
- Posts, pages, and other custom post types
- Comments
- Custom fields and post meta
- Categories, tags, and terms from custom taxonomies
- Authors
We should also note that WordPress importer also allows you to import from other blogging platforms as well. This will come in handy if you decide to change to WordPress because other platforms don’t suit your purpose anymore.
2 How to Use a WordPress Importer
Now you know what a WordPress Importer is, but how do you use it? It’s not as hard as you might think.
Instead of moving the data manually, you’re using a tool to do it all for you. Neat, isn’t it?
To help you understand our instructions a little bit better, we will refer to the old site that you want to import the content from as Site A. The new home for your old content will be referred to as Site B.
Step 1: In Site A, Decide Which Content you Want to Move, and Export the File
One great thing about using the integrated WordPress importer tool is that you can pick and choose which data to transfer. You can move the whole page, or just individual pieces of content, pages, etc.
In your Site A’s WordPress dashboard, go to Tools -> Export.
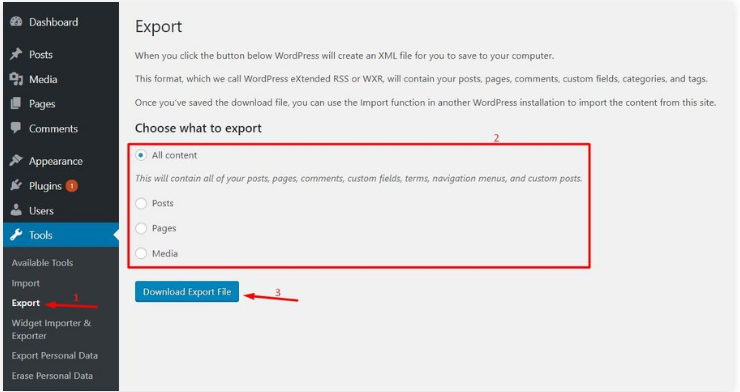
In this page, you can choose what to export. If you want to export everything, then leave the “All content” checked.
However, if you only want to export some parts of your old content, here is how you choose what to move:

There are various options for you to choose from. For example, if you want to move posts, you can choose to only export posts under a specific category, posts that were only written by a particular author, posts created under a specific date range, etc.
When you are happy with your choices, go ahead and click “Download Export File” and save the XML file to your computer.
This concludes what you need to do in Site A. To get to the next step, go the WordPress dashboard of Site B.
Step 2: In Site B, Install the WordPress importer
To successfully import data from Site A, first you need to prepare the tool in Site B. On your dashboard, go to Tools -> Import to get to the import page.
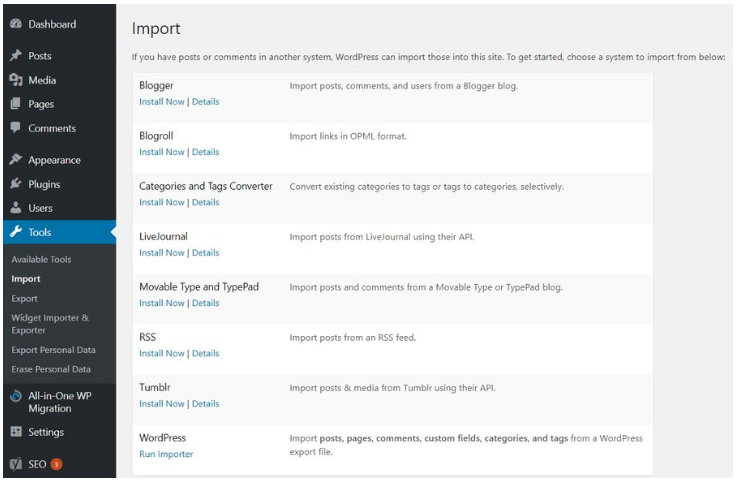
Click Install Now under WordPress if you haven’t installed the WordPress importer. After installing, click Run Importer.
Step 3: Import the Exported XML File
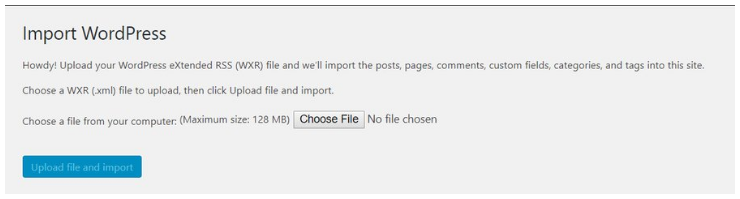
Find the exported XML file and upload it to your new site.
To do so, first, click on Choose file and pick the XML file that you saved earlier. Second, click on Upload file, click Import and wait for the process to finish.
The upload time may vary depending on the size of your file.
Step 4: Assign the Authors
Your new WordPress site may not have the same authors as the old one. That’s why you need to assign them.

Then, click on Import Attachments if you want to download the image attachments.
Click submit when you’re done and wait until the process ends. You will then be redirected to the following page.
Congratulations, you successfully imported your old content to a new home. However, this will only work for importing blog content. If you are looking for moving things besides content, you may want to refer to third-party tools.
There are great tools to work with, to make the transfer easy and stress-free.