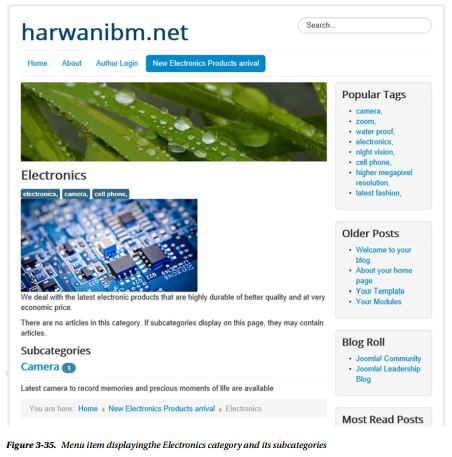
Now that you’ve performed all the steps to create the web site contents, it is time to see the result. Open the browser window pointing to your web site and refresh it, or just click the Preview button at the top right of the Menu Item Manager. On the front end, you’ll find that the menu item New Electronic Products Arrival appears in the Main Menu. Select this menu item; it will display the subcategories under the Electronics category and the number of articles that these categories have, as shown in Figure 3-35.
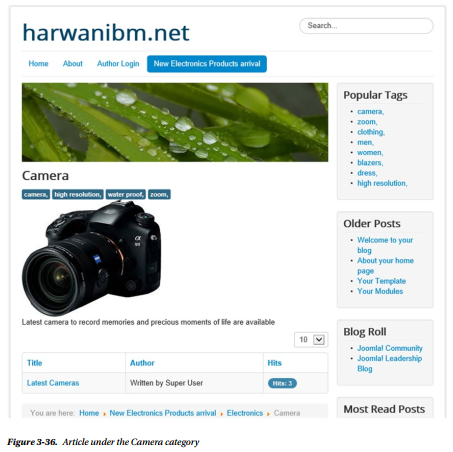
Select the Camera subcategory of the Electronics category; the description titles of all the articles under this category will be displayed, as shown in Figure 3-36.
Select the link for the “Latest Cameras” article; its content will be displayed on the screen, as shown in Figure 3-37.
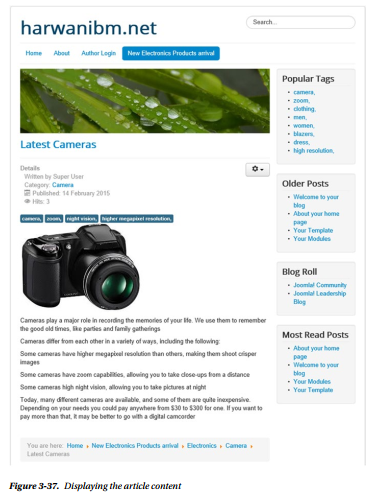
Because you selected Category Blog for the menu item type (refer to Figure 3-33), you first got the subcategory (Camera) of the selected category (Electronics) on selecting the New Electronic Products Arrival menu item from the Main Menu. When you selected the Camera subcategory, the title of the article (“Latest Cameras”) in that category was displayed, and when you selected the article title, the information stored in that article was displayed. But you can always change the menu type to display the kind of information that you want to be displayed when clicking the menu item.
1. Working with the Home Page
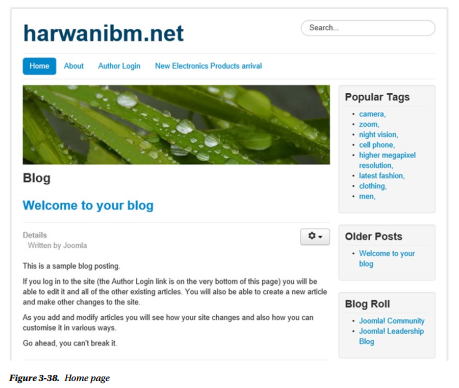
The home page is the first welcome page when you open any web site. It can be any other page also, but usually it is the first page of the web site (see Figure 3-38).
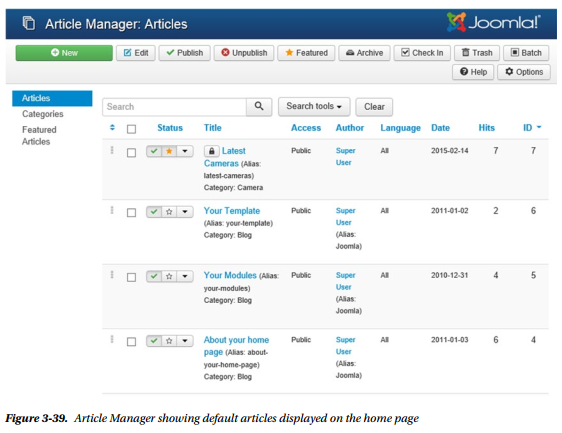
The articles that you see in Figure 3-38 are provided by Joomla by default. Open the Article Manager from the Control Panel to see the list of sample articles that are provided by default (see Figure 3-39).
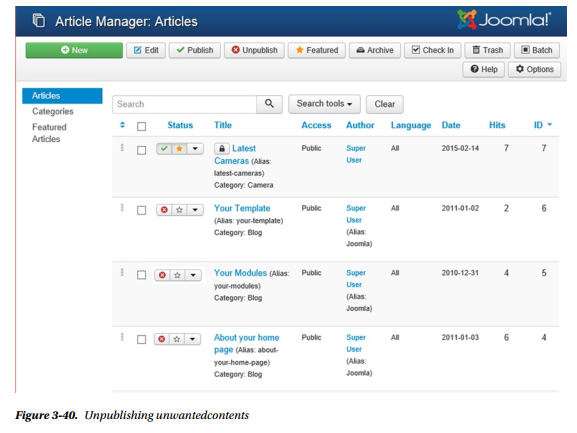
Suppose that you want the three articles “Your Template,” “Your Modules,” and “About your home page” to be removed from the home page. Just select the check boxes of these three articles and click the Unpublish button in the toolbar. You’ll find that the check mark in the Published column of the selected articles changes to a red X, which means that these articles will no longer be shown on the home page (see Figure 3-40).
To see the effect in your web site, open the web site browser window and click the Refresh button. You’ll see the result in which all the articles except those that you set to Unpublish are visible.
Okay, you now have a basic web site, but it doesn’t look very exciting yet. The easiest way to change the appearance of a Joomla site is by applying a template. There are hundreds of templates available that cover every kind of design, so I’m sure you’ll find something that suits you. For now, though, you’ll start by looking at the templates that came preinstalled with Joomla.
2. Applying a Different Template
A template is the predefined structure that gives a dynamic look to a web site. A template consists of cascading style sheets (CSS) and a layout that defines the positions of components and modules in it. When a template is applied to a web site, the location of the modules and components are relocated according to the layout in it, and the styles are applied to the content of the web site.
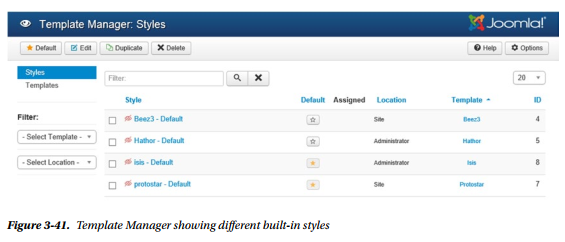
By default, Joomla provides two front-end templates and two administrative templates. The front-end templates determine the appearance of the web content; and the administrative templates determine the appearance of the administrative interface that the administrator uses to create web content, upload images, and install extensions. The two front-end templates provided are protostar and Beez3; the back-end templates are isis and Hathor. You can see these templates in the Template Manager that you can open from the Control Panel (see Figure 3-41).
Besides using these templates, you can also add templates to the system through the Extension Manager. Some templates are available for free and some require a payment. You can even create your own custom templates if you have knowledge of PHP programming.
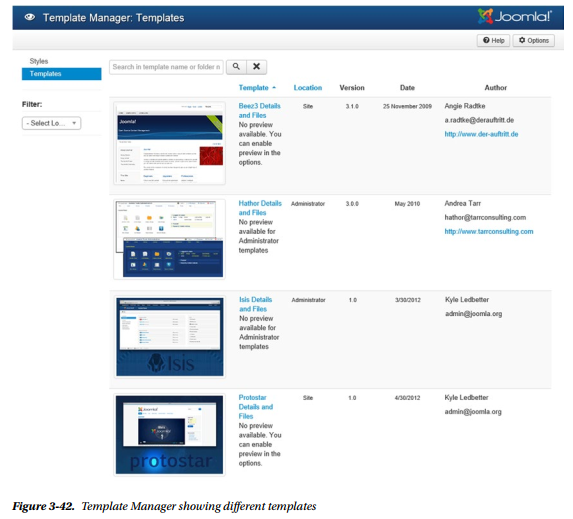
Click the Templates tab in the Template Manager to have a detailed look and feel of installed templates, as shown in Figure 3-42.
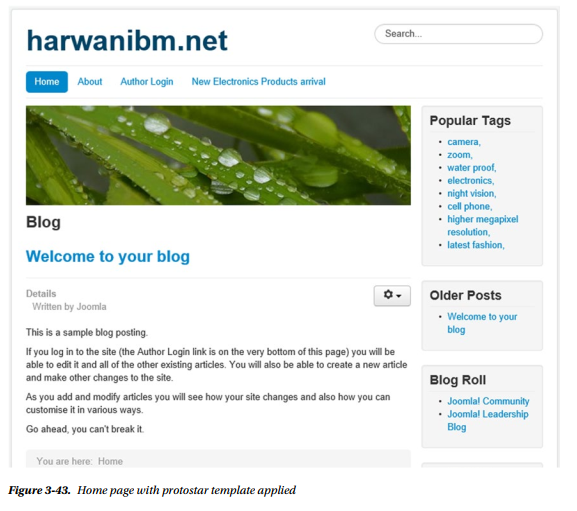
The default home page appears in the applied front-end templates styles. The default applied template for the frontend is marked with a star. You can see in the figure that protostar–Default is applied to the home page by default. The protostar template is very simple and uses Bootstrap to make it easily adjust to various screens of mobile devices without applying major style sheet modifications. The home page in protostar–Default appears in Figure 3-43.
Let’s change the default template for the home page to Beez3. To do so, click the check box to the left of the style (Beez3–Default) and click the Default tool button in the toolbox at the top. The star changes from protostar to Beez3.
Switch to the browser window that is displaying your web site (the one pointing at http://localhost/ joomlasite) and click Refresh. The effect of the template on the Joomla web site will appear, as shown in Figure 3-44. Notice that the location of the modules and contents has changed, and the CSS present in the current template have changed the appearance of the web site altogether.

You can also download third-party templates and create your own templates (these will be covered in later chapters). As an introduction, this is enough for you to know about templates.
After this quick start on how to create content in your Joomla web site, let’s take a look at the rest of the buttons available in the Control Panel. You can use this chapter for reference if you ever need a reminder of what the various managers do.
Source: Harwani B M (2015), Foundations of Joomla!, Apress; 2nd ed edition