To install Joomla on a local server, you have to first download it from www.joomla.org/download.html. The latest Joomla version available for download at the time of this writing is Joomla3.4.1. The archive file that is downloaded is namedJoomla_3.4.1-Stable-Full_Package.zip. You have to unzip the Joomla ZIP file into a subfolder of the htdocs directory of XAMPP. That is, you have to first make a subfolder inside the htdocs directory of your XAMPP project, in which you will store all the Joomla files and folders. Recall that you installed the XAMPP project in the default c:\xampp folder, so open this folder and go to its htdocs directory. Now make a subfolder in the c:\xampp\htdocs directory. I called mine joomlasite, but the name doesn’t matter. The only thing left to do now is to copy the Joomla files and folder into this joomlasite subfolder.
Download the latest Joomla package from the Internet by going to www.joomla.org and clicking the Download Joomla button. It is packaged in a ZIP file, so you need the appropriate software, such as WinZip, to unpack it. I downloaded the Joomla package, which is in the form of a Joomla_3.3.6-Stable-Full_ Package.zip file, but this may vary depending on the latest release available on the Internet. Unzip the file to any folder and copy all the unzipped files and folders of the Joomla package into the joomlasite subfolder (created in the c:\xampp\htdocs directory).
Joomla version 3.3.6, the latest version of Joomla, includes the following added features:
- It allows you to preview your web site after making
- It has an improved user interface that allows you to easily manage media files (images, songs, videos, ).
- It includes a new plug-in
- It allows multi-CSS file
- It has full support for Atom 0 and RSS 2.0 feeds.
- It has better internationalization support, including full UTF-8 support, RTL support, and translation using INI
- It contains several components that help develop Ajax applications easily.
Joomla is installed using a browser. So open your browser and point it to the following address: http://localhost/joomlasite/ (assuming you have copied the Joomla files and folder into the joomlasite subfolder of the htdocs folder). A Joomla installer will be invoked that installs Joomla through a step-by- step approach. Each step prompts you to enter required certain information. Step 1 of the installer, the Main Configuration screen, will display (see Figure 2-24).
Note If your server is not properly configured to run Joomla, you get a system status page instead of installation steps that inform the pending requirements for installing After installing the required components, reload the page to begin the Joomla installation.
1. Step 1
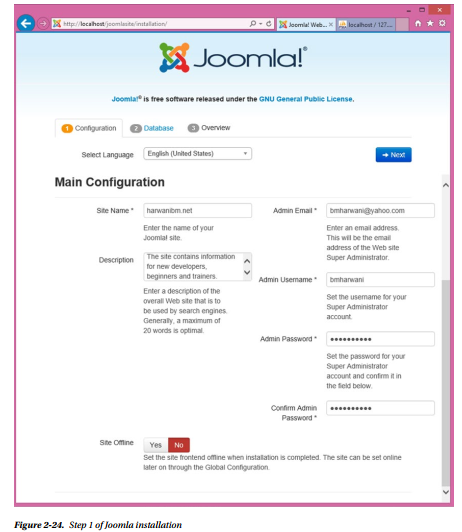
Step1 of the installation wizard is the Main Configuration screen shown in Figure 2-24.
The Main Configuration screen prompts for the following information:
- The Select Language box prompts you for the language to be used for the installation steps. Choose your preferred language from the drop down list or don’t make any changes to select the default language: English (United States).
- In the Site Name box, enter the name for your Joomla I’m using the name harwanibm.net, but you can use whatever name you want for your site.
- In the Description box, enter a brief description for your Joomla This description will become your site’s default metadata.
- In the Admin Email box, enter the valid e-mail address of the site’s administrator.
- In the Admin username box, enter the admin’s username.
- In the Admin Password box, enter the admin’s password.
- In the Confirm Admin Password box, re-enter the admin’s password to confirm it.
- The Site Offline button determines whether to make the site online (visible to visitors) or offline (invisible to visitors). Clicking the Yes button will make the site offline, but it can be made online later through Global Configuration.
- Click the Next button in the upper-right corner of the page to move on to the next step.
The information entered here can be changed after installation via the Joomla Global Configuration Manager.
2. Step 2
Step 2 of the installation wizard is the Database Configuration screen shown in Figure 2-25.
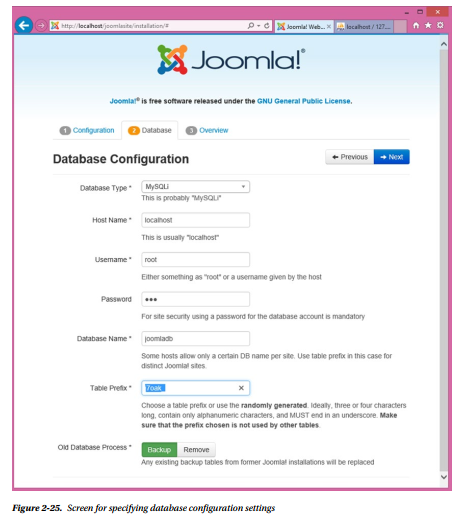
The Database Configuration screen prompts you to enter the following information:
- From the Database Type combo box, select the type of database that your server is To install Joomla on Microsoft SQL Server, you need to install drivers for PHP for SQL Server and enable Microsoft SQL support in your PHP installation.
- In the Host Name box, enter the hostname for your database. Because Joomla is being installed on the local server, simply enter localhost in this box.
- In the Username box, enter the username for the database. Enter root as the username in this box.
- In the Password box, enter the password associated with the Recall that via phpMyAdmin you set the root user’s password to mce (or whatever password you chose) by altering the contents of the user table of the mysql database.
- In the Database Name box, specify the name of the database that you earlier created via phpMyAdmin in MySQL. Recall that the MySQL database that you created through phpMyAdmin was named joomladb. This database will now be used for storing the content of the Joomla web site.
- In the Table Prefix box, you can enter a set of characters that end with an underscore or you can leave it unchanged to its default value.
- The Old Database Process, which is used when replacing an existing Joomla, determines whether you want to backup or delete the tables of the former Joomla Because you are installing Joomla for the first time, whether you choose the Backup or Remove button, there will be no effect.
Note Even if a database is not already created, the Joomla 0 installer can create the database for you during the installation process. Make sure that the specified user account exists and has sufficient privileges to create a new database.
After entering the preceding information, click the Next button in the upper-right corner to move on to the next step.
3. Step 3
Step 3 is the “Finalisation” screen that helps you determine whether you want to install Joomla with or without sample data (see Figure 2-26).
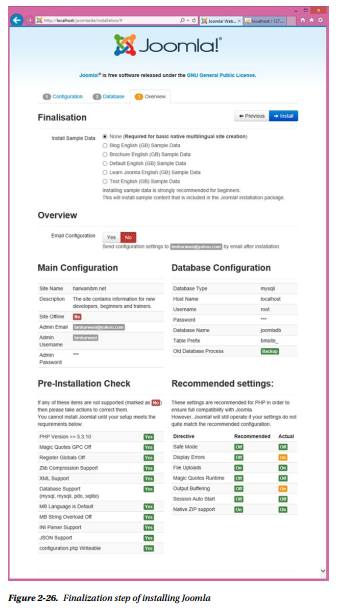
The step also allows you to review and check whether the information entered in the earlier steps is correct. After revising the information and finding it correct, choose the desired type of sample data to be installed along with Joomla and click the Install button to initiate the Joomla installation. If this is your first time working with Joomla, I highly recommend that you install the sample data, which will help you understand the structure of a web site and the role of different menus and modules. Obviously, using sample data saves a lot of time when compared with creating a site from scratch.
The sample data, which includes a set of menus, navigation links, sections, and categories, is extremely useful for beginners learning the workings of Joomla and its different modules.
A brief description of different sample data options is as follows:
- None: A very basic web site will be created that will contain nothing but a menu and a login No content or modules will be created for you. This option is not recommended for a beginner.
- Blog English (GB) Sample Data: The site that appears like a blog will be created. Few articles will be published on the home The right sidebar will display blog features such as a list of recent posts, a blog roll, and a list of most popular posts.
- Brochure English (GB) Sample Data: The site in a brochure format will be created. Meant for small business, the home page will be set as a static page that shows only one The sidebar will show additional informational about the site through links such as About Us, News, Contact Us, Login Form, and so on.
- Default English (GB) Sample Data: The site similar to the brochure format will be created, but the sidebar will contain a Latest Articles module instead of a simple text
- Learn Joomla English (GB) Sample Data: A site will be created that contains information on how Joomla 3.0 works. The home page includes articles and examples for beginners, upgraders, and professional Joomla The sidebar includes links that will point at the Joomla community.
- Test English (GB) Sample Data: A site will be created that helps test Joomla 0. It is designed for users who want to contribute to Joomla 3.0. The home page article features information on how to run tests and report bugs to Joomla; the sidebar provides links for simple testing.
Choose the Blog English (GB) Sample Data option from the list of available options because it will create a very simple blog site for you. After selecting this option and clicking the Install button, Joomla files will be immediately installed, along with the sample data on your local server.
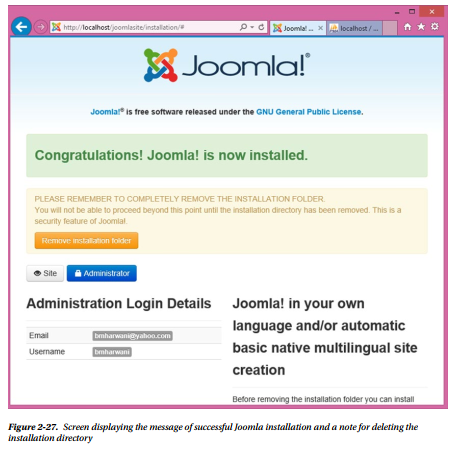
Finally, you’ll get a Finish screen displaying the message Congratulations! Joomla Is Now Installed. You’ll also get a message telling you to remove the installation directory from the joomlasite subfolder (in the c:\xampp\htdocs directory), as shown in Figure 2-27. This is a compulsory condition for successful installation of Joomla because of security reasons.
4. Deleting the Installation Folder
To delete the installation folder, click the Remove Installation Folder button. You can also delete the installation folder manually by using Windows Explorer or with the command line. After removing the installation folder, you get the confirmation that it was successfully deleted. The figure shows two buttons, Site and Administrator, which can be used to open the Joomla site and Joomla administration interface to manage its content.
By clicking the Site button, the Joomla web site will be displayed, as shown in Figure 2-28.
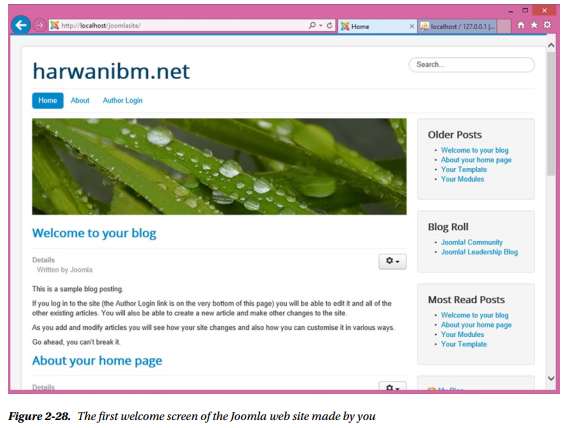
The page that appears is actually your new web site. The reason why all that content is already there is because you clicked the Install Sample Data button earlier. You will be changing this web site throughout the rest of the book to make it your own. This web site can now be accessed anytime by pointing the browser at http://localhost/joomlasite (replace joomlasite with whatever you called your web site earlier).
Note I’ll be using joomlasite throughout the book, so remember to change the name to whatever you called your own web site whenever you see it appear.
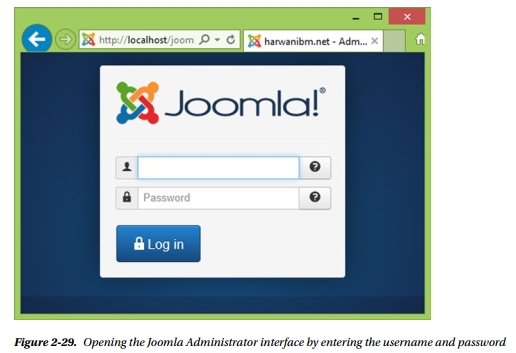
To administer this Joomla web site and manage its content, you have to use the Administrator interface, which you can open by pointing the browser at the following address: http://localhost/joomlasite/administrator. Before opening the Administrator interface, you will prompted to specify the super-administrator’s username (bmharwani) and password (the password you entered during the Joomla installation earlier), as shown in Figure 2-29.
In the Administrator interface, you find a Control Panel and menus to manage the web site contents, as shown in Figure 2-30.
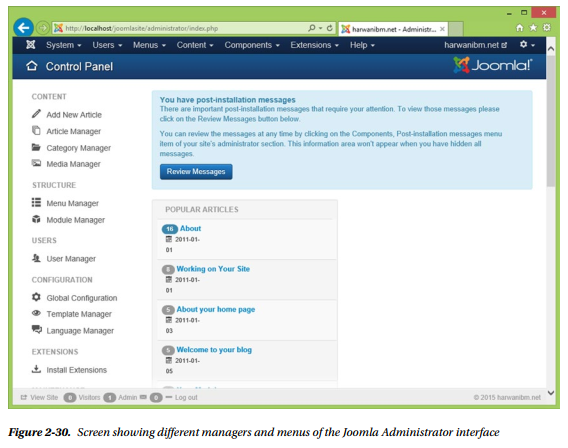
Note From Chapter 3 onward, you will learn how to use these managers and menus to maintain your Joomla web site.
That’s it for installing Joomla on your local machine. The next thing you need to do if you want the rest of the world to be able to see your Joomla site is to install Joomla on a remote server. When you do so, the hostname, username, and password are provided by the hosting company.
Having your web site hosted involves the procedure of uploading your web site to a public server to be viewed and accessed by the rest of world. It gives you the ability to show your presence on the Internet. Web-site hosting has become the most common medium to advertise services, facilities, and products provided by an organization. It has also become a great medium to get feedback from customers around the globe. The server space for hosting web sites is provided by various web-hosting companies.
Web-hosting companies offer an environment in which people can have their piece of cyberspace on the Internet 24/7 without great cost. These companies provide the space in which you can keep your web site, news, bulletins, documents, data, and post office (mail server) to accept mail. You just need to pay for the disk space used on the server and any extra charges for database support. The core components in a web-hosting environment are the web server, FTP server, mail server, and database server.
Source: Harwani B M (2015), Foundations of Joomla!, Apress; 2nd ed edition