By default, WordPress displays your posts in a reverse chronological order, based on the date of their publishing. This means that the latest posts are displayed at the top, and for the older ones you usually have to dig a bit deeper. For many websites, like news outlets, blogs, magazines and such, this is perfectly fine. However, there are many cases in which you might need to change this order and create your own, or to place certain posts in certain positions in the list. This can actually be done quite easily using one of the methods we are going to discuss here.
1. Why Reorder Your WordPress Posts
Displaying the latest posts first is not always the most appropriate way to go about presenting your content on your website. For example, you may have a series of posts that form a coherent unit among them, but are published at different times. This is the case with long-form pieces that are broken down into several parts. Logically, you want the Part 1 to be the first one, followed by Part 2, with Part 3 coming after, and so on. By default, WordPress doesn’t allow this, and displays the posts in the reverse chronological order. If you create a custom order, your posts will be listed in a logical, intuitive way, which will greatly improve the user experience.
Also, sometimes it’s a good idea to keep a specific post on top. Creating a sticky post is one way to do it, but it’s not the same as reordering your blog posts or creating a custom order. With sticky posts, one post is permanently pinned to the top, whereas you may want to push certain posts higher in the blog roll or arrange a group of related posts together.
2. How to Change the Order of Your Posts in WordPress
There are a couple of ways to reorder your WordPress blog posts. One of them involves some coding and we’re not going to get into that one just now. The other two are extremely simple and suitable even for complete WordPress newbies.
2.1. Changing the Publish Date
Many users prefer changing the publishing date of their posts to manage their order. Since WordPress displays the latest posts first, if you want to push a certain post up or down, all you need to do is give it the latest date. Similarly, to push a newer post down, among the older ones, simply give it an older date. You can do this with all your posts, thus creating a custom order completely controlled by yourself.
Log into your website’s back end and pick the post you want to change the date for.
In the right-hand side of the screen, you will find the publication date of the post, along with its status and visibility. Click on Edit next to the date.
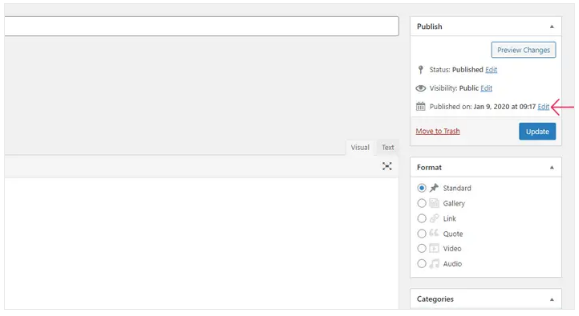
Pick the date and the time from the calendar and click on OK. Don’t forget to hit Update to save your changes.

The steps are more or less the same for Gutenberg users.
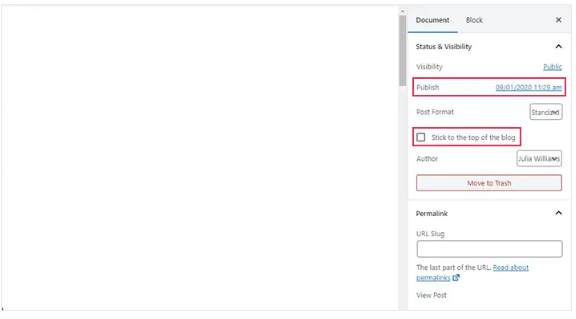
There is no Edit button here but a calendar will open when you click on the publish date, allowing you to pick the one you want.
Note that here you also have the option of sticking the post to the top of the blog.
When it comes to this method, it’s good practice to pick dates that fit the overall chronology of your blog or website. For example, if most of your posts were written in 2019, don’t change the date to, say, 2010, as the readers will find it irrelevant. Try to use dates that come as close as possible to other posts’ publication dates, to maintain coherence and relevance.
2.2. Reorder Posts Using a Plugin
The classic WordPress adage “There’s a plugin for that!” applies here too. In fact, there is more than one plugin for changing the order of your blog posts, but we decided to use Post Types Order, which is the most popular one.
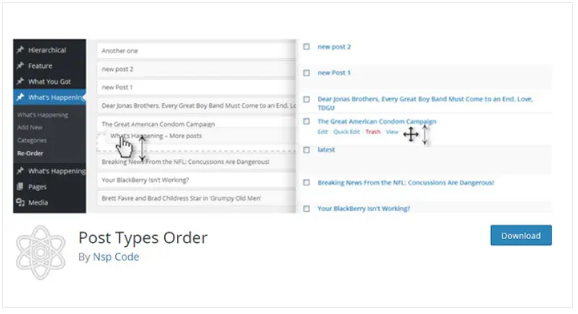
This plugin uses Drag and Drop Sortable JS capability to reorder WordPress posts, both the default ones and the custom post types.
After downloading, installing and activating the plugin, go to Settings>Post Type Order in your Dashboard menu.
You will need to configure the plugin first by choosing the post types for which you want to make the plugin interface available. For instance, you may allow this option for posts, media and blocks, but not for testimonials and slides.
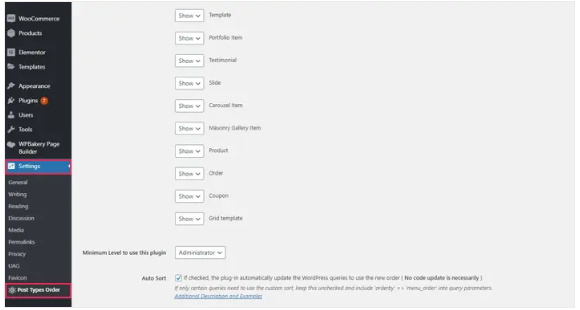
When you’re done, click on Save Settings.
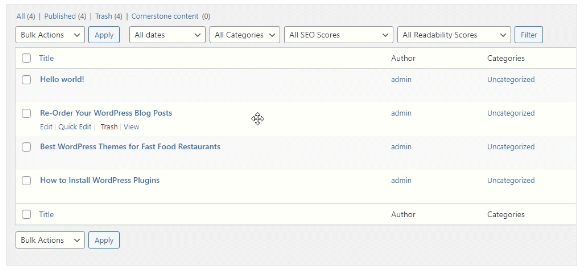
Now go to your Posts>All Posts. You will notice that you are now able to rearrange and reorder the posts simply by dragging and dropping them into the desired position. Their position in the back end list determines the position the posts will be shown on the front end.
In addition to being extremely easy to use, the great thing about this plugin is that it does not change the timestamp of your posts – it just changes their order.
2.3. Final Thoughts
Although WordPress doesn’t provide the post reorder functionality out of the box, users can still easily change the order either by altering the publish date or by using a plugin that doesn’t change the dates but allows the users to drag and drop the posts into their desired position. You can now pick the method that works best for you and finally create your own custom order of posts.
3. Using Chronological Posts
Chronological posts reverses the default post order throughout your site to be chronological instead of reverse-chronological. This can be useful for sites displaying historical content, journals, books, etc. where the content is intended to be read chronologically (typically, it works well for any sites where the entire content of the site – every post – is intended to be read sequentially). It is also useful for archived sites, preserving the history of posts in a sequential format, oldest to newest.