Advanced Random Posts Widget is wonderful free plugin which has the unique feature to display the random posts instead of recent ones. The widget selects posts at random, based on some criteria provided. The plugin becomes handy and is really useful when you have large number of posts in your website. The Advanced Random Posts Widget helps you to highlight and promote some older and classic posts. In this post, I will show steps to show related posts in WordPress with Advanced Random Posts Widget in WordPress.
Features of the Advanced Random Posts Widget Plugin:
- Supports multiple instances
- Title and its URL can be set
- Control the display of posts by giving number of post to show and skip, by hiding sticky posts and giving post type and status to show post from
- Filter posts by category, tag and taxonomy
- Support thumbnail with customization options
- Can display excerpt and dates
- Ability to write custom CSS
1. Installing the Advanced Random Posts Widget
Log in to your WordPress Dashboard.
Go to Plugins > Add New from your admin dashboard.
In the search box search for Advanced Random Posts Widget
Install and activate the plugin.

2. Show Related Posts in WordPress with Advanced Random Posts Widget
Hit Install Now button and then activate the plugin. Once you have activated the plugin, you have to go to Appearance > Widgets in your dashboard. Under the Available Widgets section you should see new widget called Advanced Random Posts Widget. To use the new widget, click on it and select Add Widget button.
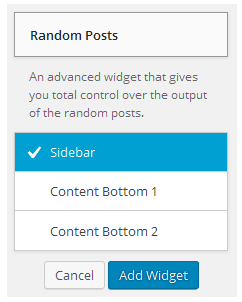
Or drag it to the Main Widget Area or Secondary Widget Area. Now the Advanced Random Posts Widget is added to your website.
3. Setting up the Advanced Random Posts
The Advanced Random Posts Widget comes with lots of features and settings. The settings are well organized in six different tabs which make them much simpler and easy to use. Here is a quick explanation of all the tabs and their internal settings.
3.1. General
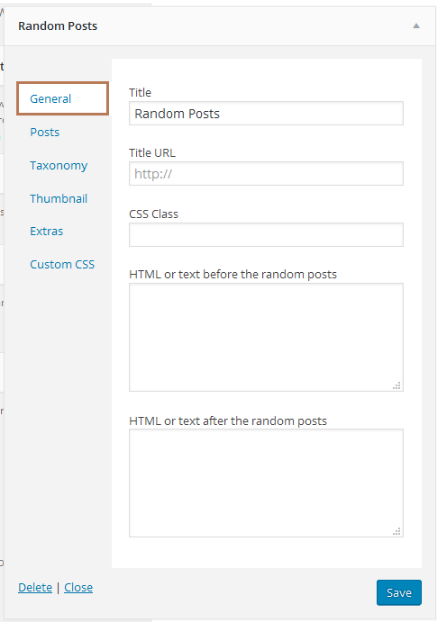
- Title: It is the main title or name given to the widget.
- Title URL: We can give any tile URL here which makes the title a link. Generally link to the archive page of all the random post is given here.
- CSS Class: This option lets you set custom css class in every widget.
- HTML or text before the random posts: Anything written in this textbox is displayed before the random posts as the name suggests. You can also include HTML tags here.
- HTML or text after the random posts: Anything written in this textbox is displayed after the random posts. You can include HTML tags too here.
3.2. Posts
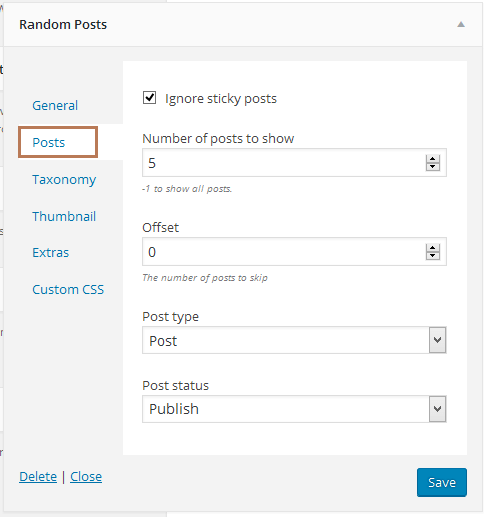
- Ignore sticky posts: Checking the checkbox removes the ‘sticky’ feature of the post. The post will be treated as normal posts.
- Number of posts to show: You can decide the maximum number of posts to show by giving a number here.
- Offset: You can mention the number of posts to skip here.
- Post type: We can select single or multiple post types to display the respective posts.
- Post status: With this option, you can decide the status of the post to be displayed which can be private, pending, trash etc.
3.3. Taxonomy
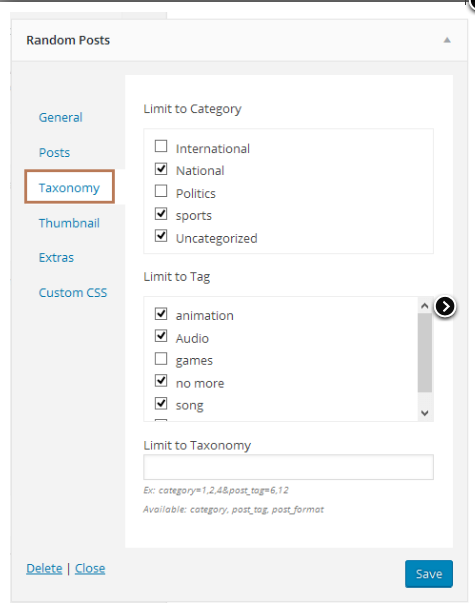
- Limit to Category: Here you can filter the posts by limiting the display of posts from selected categories only. Note that if there are no posts assigned to a category, the category will not be shown in the list.
- Limit to Tags: If you want to display the posts with certain tags only, mention it on the checkbox under Limit to tag. Only those tags are shown which has been used in at least one post.
- Limit to Taxonomy: Similarly for limiting the posts to certain taxonomy only, mention it on the textbox under Limit to taxonomy.
3.4. Thumbnail:

Display Thumbnail: This checkbox gives you the choice to display or hide the thumbnail.
Thumbnail size: This drop down list is functional only if thumbnail is made to display. There various sizes like medium, large, post-thumbnail etc. By default it uses arpw-thumbnail which have 50×50
Use custom thumbnail sizes: If you want our own thumbnail size, choose the use custom thumbnail size checkbox.
Width & height: You can give your custom thumbnail sizes here. Note that if your images were uploaded to the media library before you have your own custom image sizes or before you installed this plugin, please re-upload the images or install plugin like Regenerate Thumbnails to fix the image size.
Thumbnail Alignment: You can align the thumbnail image to the left, right or center with the drop down list.
3.5. Extras
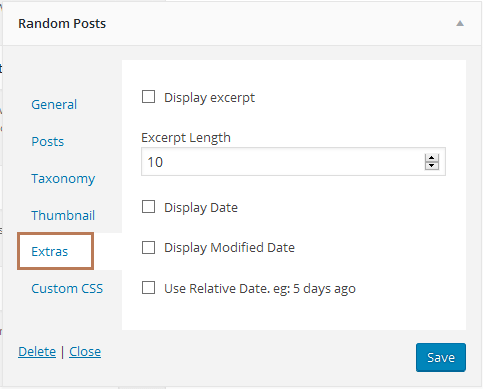
Display excerpt: Select the checkbox to display the excerpt.
Excerpt Length: This determines number of words to be displayed as excerpt.
Display date, Display Modified Date, Use Relative Date: These checkboxes allows you to display the posted date, last modified date and relative date.
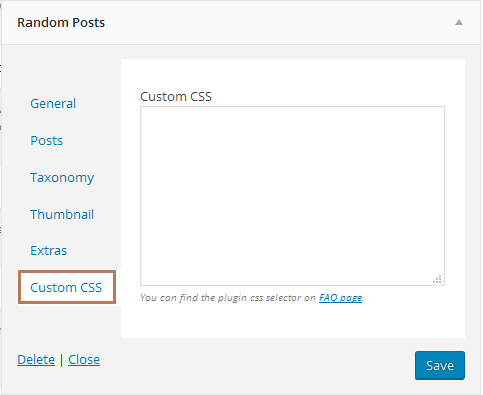
3.6. Custom CSS:
The plugin comes with simple style. If you want to add your own custom style, you can remove the default stylesheet and write CSS code in this section or in your stylesheet file.
This free plugin is a great option promoting you previously published posts which are buried deep down in your post list. This helps the visitors of your webpage to discover much more in your website. Once you have added the widget to your website, you can browse the website.
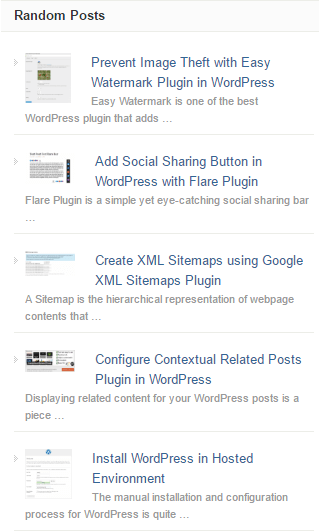
You can see the related posts as shown above. In this way, you can Show Related Posts in WordPress with Advanced Random Posts Widget in WordPress.