WordPress has dozens of administrative settings at your disposal, but you’ll probably use most of the default settings for as long as you run your site. So, the good news is you don’t need to mess with more than a few settings as you begin to build your site. This lesson familiarizes you with the pages on the default Settings menu and shows you how to change those truly important few settings. Later lessons deal with other admin settings as they’re needed.
1. The Settings Menu
The Settings heading on the main admin menu is where you control various site-wide parameters for WordPress, and its submenus are divided by functions. Figure 5-1 shows the menu and a list of key functions for each of the submenu items:

This is the Settings menu when you first install WordPress. Depending on your theme or installed plugins, this Settings menu may show more choices. Now walk through each of these settings pages and focus on the key settings you may want to change at this point.
1.1. Settings ➪ General
There are only a few settings here that you should need to touch after installing WordPress, and a few you shouldn’t touch unless you know what you’re doing.
- Site Title
This was set during the installation of WordPress, but, of course, you can change it any time using the setting shown in Figure 5-2. Before you launch your site, make sure you’ve decided on the title. It’s an important part of your identity, and search engines use this as well—if you change in midstream, it can make things difficult.
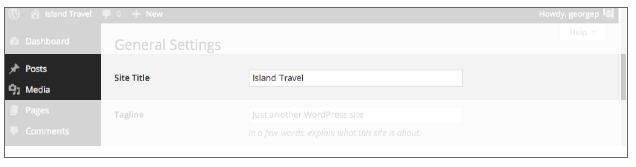
FIGURE 5-2
- Tagline
Change this right now! As you can see in Figure 5-3, the default wording is “Just another WordPress site” and if you Google that phrase, you’ll see how many millions of people have not made this important change.
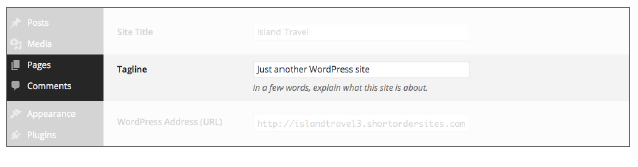
FIGURE 5-3
The Tagline is meant to be a more descriptive phrase about your site and is often displayed by themes somewhere near the Site Title. It will also get used by SEO plugins, so you want to make sure that it provides useful information about what you do or what your site is about.
- WordPress Address/Site Address
Do not touch these settings! Putting the wrong information into the fields shown in Figure 5-4 will break your site. These are created during installation, so you have no need to touch them.
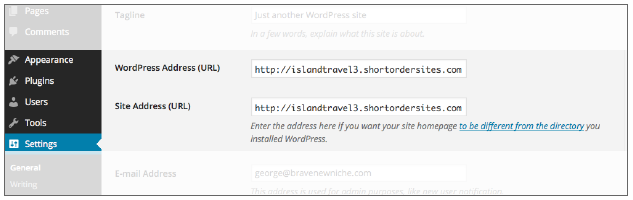
FIGURE 5-4
Although these are often the same URL, they have different functions. The WordPress address tells WordPress where to look for files, whereas the Site Address tells it what to use when constructing URLs.
If you decide to change the domain name of your site down the road, do not simply change the domain name here. There’s more to it than that. Look up “move wordpress site” in Google to find instructions.
- E-mail Address
This is the e-mail you entered as the administrator’s personal e-mail during the installation process. WordPress used it as a default for all site functions, but you can change it here in the field shown in Figure 5-5.
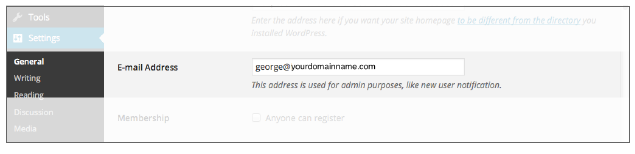
FIGURE 5-5
This e-mail is used by WordPress to send out notifications, such as automated WordPress updates, new users being added, or new comments being posted on the site. Many plugins also use this address for their settings, such as sending out a form or accessing PayPal. Plugins enable you to change the address in their settings.
- Membership
Leave the box in Figure 5-6 unchecked. If you want visitors to become users or members of your site, you should use a membership plugin rather than simply checking this box and trying to manage user registrations. Without a plugin to help manage things, you’re likely to get spam subscribers.
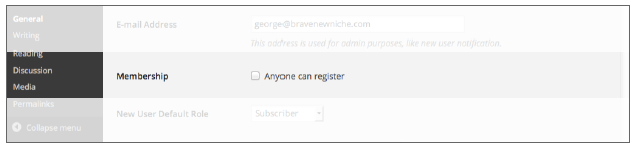
FIGURE 5-6
- Timezone
Change the time zone to match your region so that dates and times are accurate when you publish or schedule content on your site. WordPress makes this easy by providing a drop-down menu of major cities around the world, as shown in Figure 5-7. Just find a city in your time zone, click Save Changes, and the correct date and time should show up in the Timezone setting area.
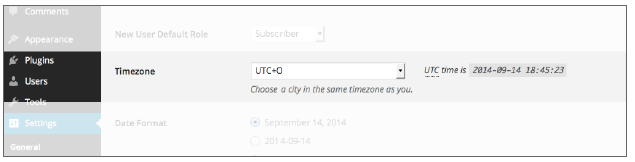
FIGURE 5-7
1.2. Settings ➪ Writing
There’s nothing to deal with on this screen when you start your site. The Default Post Category is important, but you have no categories to choose from yet, so Lesson 20, “Managing Post Categories and Tags,” covers this setting.
1.3. Settings ➪ Reading
One of the key settings on this screen is for your homepage or front page; it controls what displays when people enter your domain name in their browser. However, what setting to choose depends on what your theme needs, as well as having any pages to choose from, so this setting is discussed later at different places in the book.
Search Engine Visibility
Checking the box shown in Figure 5-8 tells search engines not to index your entire site. Depending on what you chose during installation, this box could be unchecked or checked when you first visit this screen. The default in WordPress is to have it unchecked.

FIGURE 5-8
Blocking search engines can be valuable while you build your site, especially if you build on a test site with a different domain name. But if you do check the box, be sure to uncheck it before your site goes live.
You must keep two things in mind about this setting:
- Visibility refers to search engines, not to whether anyone can see your site.
- Search engines do not have to obey this setting; it’s up to each search engine whether they honor the request.
1.4. Settings ➪ Discussion
Discussion is just another word for Comments, and the settings on this screen default to the most common way of handling comments:
- Comment authors must submit both a name and e-mail address.
- All comments are held for moderation, unless the visitor has already had one comment
- Comments are displayed in threaded fashion; that is, if someone directly replies to a particular comment, then that reply is shown below the original comment.
- You will be e-mailed whenever a comment is posted and whenever one is held for moderation.
- A comment is held for moderation if it has two or more links in it (a sign of spam).
This is the standard for comments on a website, so unless you have good reasons, just leave these settings on default.
Default Article Settings
Even though the term “article” is used in Figure 5-9, these settings refer to both Posts and Pages. You must understand that particularly for the third check box, Allow people to post comments on new articles. The default setting is checked, which means that all Posts and Pages will have a comments area. Typically, you don’t want a comments box on pages, so it might be tempting to uncheck this setting, but then any Posts you create after that won’t have comments.
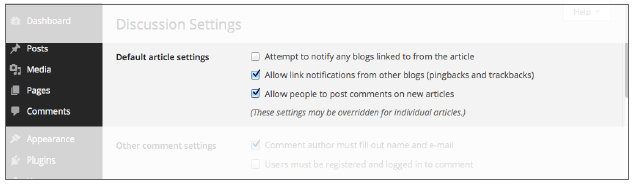
FIGURE 5-9
My recommendation is to leave this box checked. It’s simple to remove comments from individual Pages (or Posts), even large numbers of them. You learn how to do this in Lesson 10, “Adding a New Page,” and Lesson 18, “Managing Posts and Pages.”
1.5. Settings ➪ Media
These settings affect the media files you upload to WordPress.
Image Sizes
When you upload an image to WordPress, a set of smaller versions is created based on the sizes you see in Figure 5-10. You can change these dimensions, but a lot depends on the particular theme you use. For example, if the theme has a wide area for actual content, you might want to increase the Medium setting to 400 px or more, or a theme may create its own versions of images to fit particular layouts for that theme.

FIGURE 5-10
It makes sense not to touch these dimensions until you know whether they need changing and, most important, what to change them to.
1.6. Settings ➪ Permalinks
A default link to a WordPress web page looks like this: http://yourdomainname.com/?p=8723. It’s nicer for visitors and better for search engines if these links have words relating to the topic of the particular page. That’s what the Permalinks settings enable you to do.
Working with Permalinks, however, is no quick or easy decision and can have negative consequences if you do it incorrectly. So ignore this for the moment; you return to the topic in some depth when you get to Search Engine Optimization in Lesson 31, “Optimizing Behind the Scenes.”
2. Profile Settings
The Profile page is where users control personal preferences for the admin area and information for the site in general. For example, if your posts display the author’s name, this is where you set what name displays. You can access the Profile page from the top-right area of the Toolbar and from the Users submenu on the main menu, as shown in Figure 5-11.
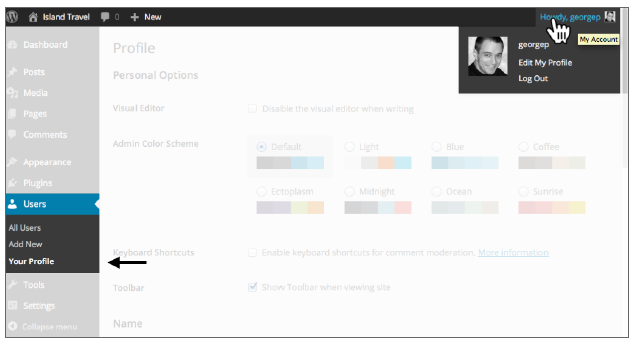
FIGURE 5-11
There are three key items in Profile settings that you need to pay attention to at this point.
2.1. Toolbar
This setting determines whether the Toolbar displays on the front end of the website while logged in. As shown in Figure 5-12, the option is turned on by default. Although you can turn off the Toolbar on the front end, there is no option to turn it off on the back end, that is, on admin screens.
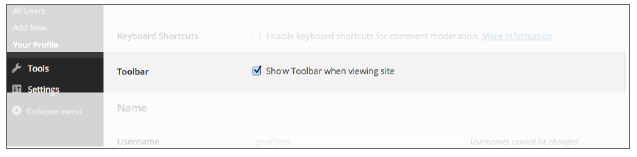
FIGURE 5-12
2.2. Display Name Publicly As
Although the username you entered during installation can never be changed, your Profile has fields for a First Name, Last Name, and Nickname. The Nickname is required and by default WordPress adds in your username, but you can change that on this screen. After you have at least one name other than the username, you can change the setting Display name publicly as, as shown in Figure 5-13.

FIGURE 5-13
This setting controls how WordPress lists you in various places around the website; the most obvious is on Posts and Pages for which you’re the author.
2.3. Password Strength Indicator
The Profile page enables users to change their passwords. To try and ensure they don’t choose bad passwords, WordPress provides a strength indicator that tracks the quality as the new passwords are entered. Figure 5-14 shows the four levels of strength and an example of a password that would trigger each level.
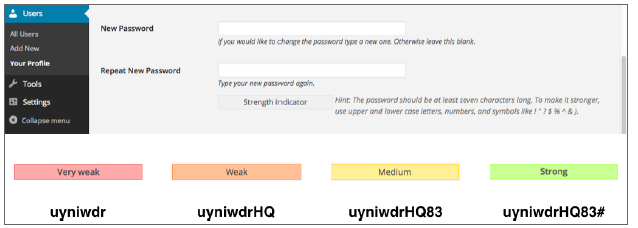
FIGURE 5-14
Referring to Figure 5-14, WordPress also provides instructions on how to make passwords strong. One thing you should add to those instructions is to not make the password a natural language word—a word you would find in a dictionary or use in speaking to someone. The more random a password, the better.