Up to now, you’ve learned about entering, editing, styling, and laying out text content. In this lesson, you begin the same process for media files, which primarily means images, but also includes video, audio, and documents.
There are two scenarios for adding new media files to WordPress:
- Uploading and inserting them into the content of a specific Post or Page
- Uploading them to the Media Library for later use
Each of these is demonstrated with images because they’re the most common media files you’ll use, but the basics apply to other media types as well.
1. Uploading And Inserting An Image Into A Post
Adding images to the content of a Post (or, of course, a Page) is a simple process that begins with deciding where you want the image to appear. Then place your cursor at that point in your text, as shown in Figure 11-1.
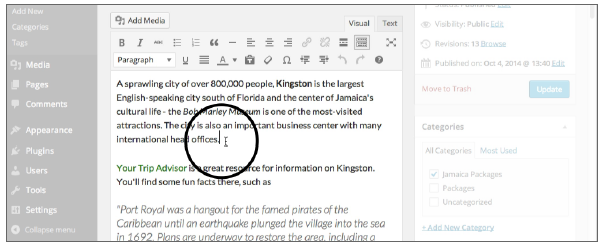
FIGURE 11-1
Don’t worry if you change your mind about the location after uploading. Moving an image within the Content Editor is a matter of dragging and dropping it to a new spot.
Now you’re ready to add the image by using the Add Media button located at the top left of the Content Editor, as shown in Figure 11-2.

FIGURE 11-2
Click the Add Media button to produce a pop-up window known as the Media Uploader, as shown in Figure 11-3.
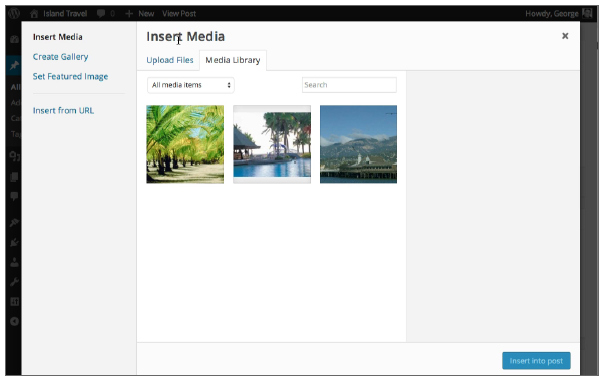
FIGURE 11-3
Make sure the title at the top of the Media Uploader says Insert Media. This window can perform a number of functions (see Lesson 12, “The Media Uploader Window”), which are listed at the left side. If the Insert Media title isn’t showing, simply click its link on the left side menu.
In the center area of the Insert Media screen, you have two tabs representing the two choices you have for inserting media content into your Post:
- Upload Files—Choose new files from your computer.
- Media Library—All files already uploaded to WordPress.
In this case I’ll be uploading a new image, so I click the Upload Files tab, and now the Media Uploader screen looks like Figure 11-4.
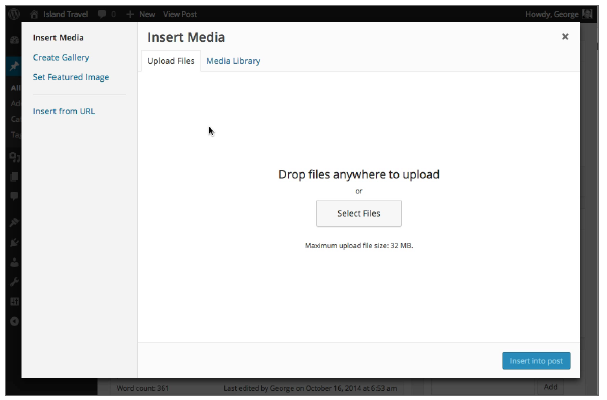
FIGURE 11-4
I can either drag my file(s) to the center area of the window or use the Select Files button and get the traditional pop-up window allowing me to choose from files on my computer.
You see a progress bar during the uploading process, and when that’s complete, the screen shows two thumbnails of your image: one on the right side and one in the center area with a blue check mark, as shown in Figure 11-5.
That check mark confirms that this is the image you’ll be inserting, so you’re ready to click the blue Insert Post button at the lower right side.
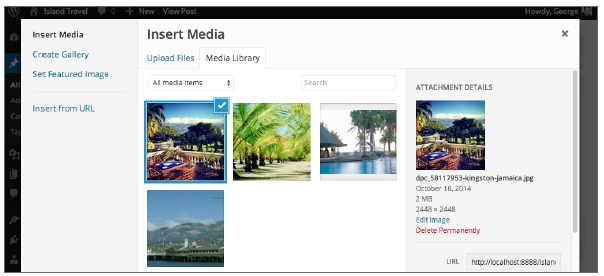
FIGURE 11-5
Now there are a number of options on the right side of the Media Uploader screen (discussed in Lesson 12), but for the moment I’ll click the Insert into Post button, and you see the result in Figure 11-6.
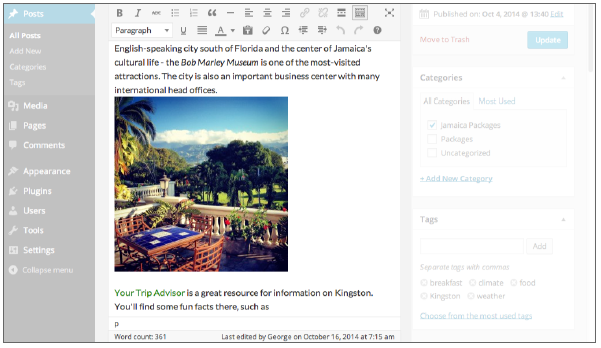
FIGURE 11-6
Although you can see the image in your content, remember you still need to click the Update button for WordPress to save the inserted image.
In Lesson 13, “Working with Images in the Content Editor,” you can see more about how to position images exactly the way you want, but for the moment you can see how straightforward it is to place an image in your content.
You can repeat this process to add as many images as you want for a particular Post. However, if you have a lot of them, you might consider creating a Gallery, which is covered in Lesson 15, “Working with Image Galleries.”
For mobile users on a narrow screen, the Media Uploader screen looks a little different. The menu on the left is at the top left instead and toggles you between the various choices, as you can see in Figure 11-7.
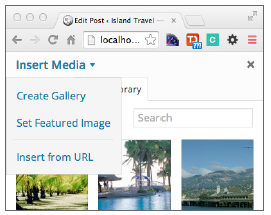
FIGURE 11-7
In the previous example, I uploaded a new image and inserted it into a particular Post. But the image also became a part of the Media Library. In other words, the image can now be used elsewhere on my website.
Any media file that gets uploaded to WordPress becomes a part of the Media Library, even if it was uploaded for use in a specific Post.
In some cases you’ll have media files you think you may want to use in the future, but for which you don’t have a specific place at the moment. This is when you can use the uploading function only.
2. Uploading An Image To The Media Library
Adding media files to WordPress without insert- ing them into any specific Post or Page—upload- ing them only to the Media Library—can be done through one of two links: one in the main admin menu and the other in the tool bar, as shown in Figure 11-8.
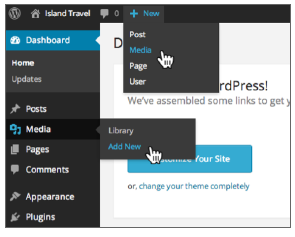
FIGURE 11-8
Both links lead to the Upload New Media screen, as shown in Figure 11-9. You can see the familiar upload interface allowing you to drag and drop files or use a pop-up window to browse files on your computer.
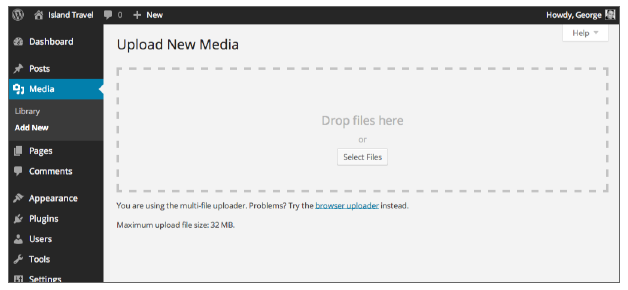
FIGURE 11-9
During the uploading process you see a progress bar on the right, as shown in Figure 11-10 A. When uploading’s complete, a small thumbnail of the image appears on the left with an Edit link on the right, as shown in Figure 11-10 B.
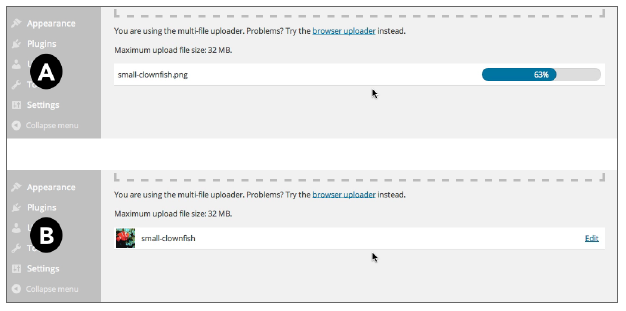
FIGURE 11-10
But for the moment there’s nothing more you need to do. The image is now available for use anywhere on your site, which you can verify by going to the Media Library. In Figure 11-11 you can see the new image listed.
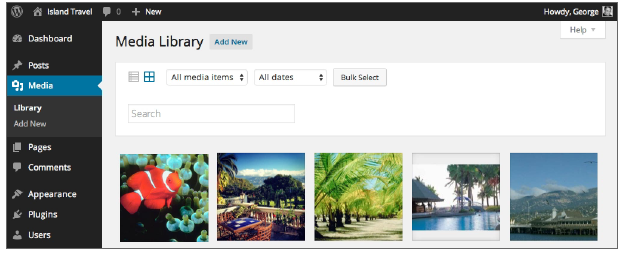
FIGURE 11-11
Having seen how to upload a single image to the Media Library, suppose now you have 30 images or other media files that you know you want to use at some point. Are you doomed to go through the upload process 30 times in a row?
Thankfully, the Add New Media screen enables you to upload multiple media files at one time. You simply drag or choose multiple files, and as with the single image in our example, you’ll get a prog- ress bar for every file (as shown in Figure 11-12).

FIGURE 11-12
When each file is finished uploading, you’ll see a thumbnail for images or an icon indicating the file type (video, audio, or document).
Keep in mind that uploading multiple media files at a time is only possible with the default Upload New Media screen. Sometimes, though, your browser does not allow you to use that screen, which can cause potential problems when uploading media files.
3. Problems Uploading Media Files
Every so often you may run into trouble when uploading a media file, and the four most common issues are:
- Your file is too large.
- Your browser does not support the WordPress upload
- Your file is of the wrong type.
- WordPress does not have permission to upload.
3.1. Issues with File Size
If you follow my advice about image sizes and don’t try to upload anything more than 150 K, file size will never be an issue. But with other types of media, even when optimized, size can be an issue.
Your hosting company is actually in charge of how large files can be for uploading, and WordPress tells you what this limit is, as you can see in Figure 11-13.
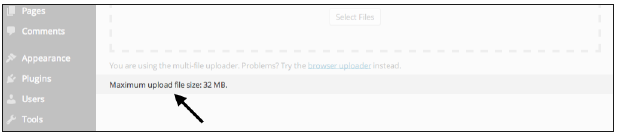
FIGURE 11-13
The limit could be as low as 2 MB or as high as 128 MB; it all depends on your hosting company’s settings. You can ask it to change those settings, and depending on its policies and server set up, that may or may not be possible.
There is another way in which file size can be an issue: You may have run out of space on your host- ing account. Although most hosting companies these days offer unlimited storage, there actually isn’t any such thing. Now, most people would never reach that limit in normal use, but it is possible.
Not all hosting plans have unlimited space, however, so if you’re adding a lot of large documents or video files, it may be that you’ll run out of space and WordPress will give you a warning. This issue is discussed more in Lessons 15 through 17, when covering non-image media files.
3.2. No Browser Support for Uploading
Whenever you upload a file, WordPress displays the message shown in Figure 11-14.
Some older browsers may not play nicely with the methods WordPress normally uses for uploading files. Fortunately, there’s a fallback option, which is to use your browser’s upload function by click- ing the browser uploader link. You can see the resulting screen in Figure 11-15.
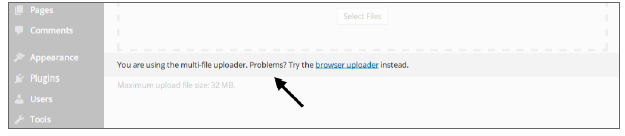
FIGURE 11-14

FIGURE 11-15
Unfortunately the upload function on this screen only allows you to select one file at a time. You can’t even use keyboard commands to select several files at once.
3.3. Incompatible File Types
Problems uploading files can also occur when the type of media file you’re trying to upload is not supported by WordPress. Although the list of allowed types is not extensive, it covers the vast major- ity of people’s needs, so normally this is never an issue. You can find an up-to-date list at http:// codex.wordpress.org/Uploading_Files.
Keep in mind that your hosting company may have its own restrictions on file types, so even if it’s on the WordPress list, you still may not be allowed to upload the file.
If you need to, there are ways to customize WordPress to allow a certain file type, including some plugins, which are mentioned at the end of this lesson.
3.4. No Permission to Upload
When WordPress is installed, part of that process involves giving it permission to add, edit, and delete files on the server. But occasionally permission is not given. Depending on the nature of the issue, two things happen:
- You’re simply not allowed to upload
- You have to provide login credentials every time you want to upload.
This can include not only uploading media files, but also trying to install new plugins or themes. Clearly the first situation needs to be sorted immediately by calling your hosting company. The sec-ond situation, although it does enable you to upload, becomes annoying quickly. Again, you need to talk to your hosting company and get it fixed.
In all my years working with WordPress, I’ve seen permission issues only a few times. It’s usually the result of someone doing a manual installation while he wasn’t logged in with the right permis- sions. But once I encountered it because the hosting company saw restricted permissions as a way of maintaining security. Situations like that are extremely rare. If the hosting company won’t change permissions for you, switch hosts.