Create amazing pricing tables without any programming skills.
It’s quick and easy with this WordPress Pricing Table Builder plugin.
1. Installing the Pricing Table by Supsystic
Log in to your WordPress admin panel.
In the left column navigation mouse over the “Plugins” link and click the “Add New” link.

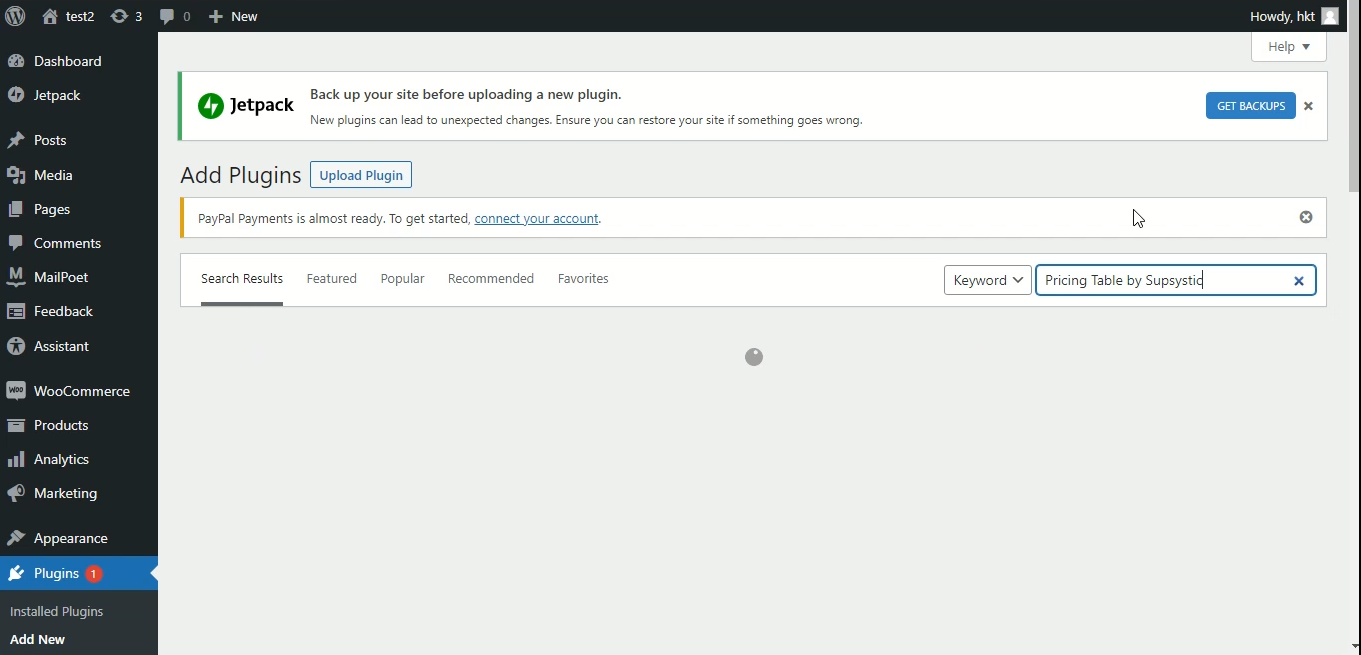
In the “Search plugins…” box, enter “Pricing Table by Supsystic.”
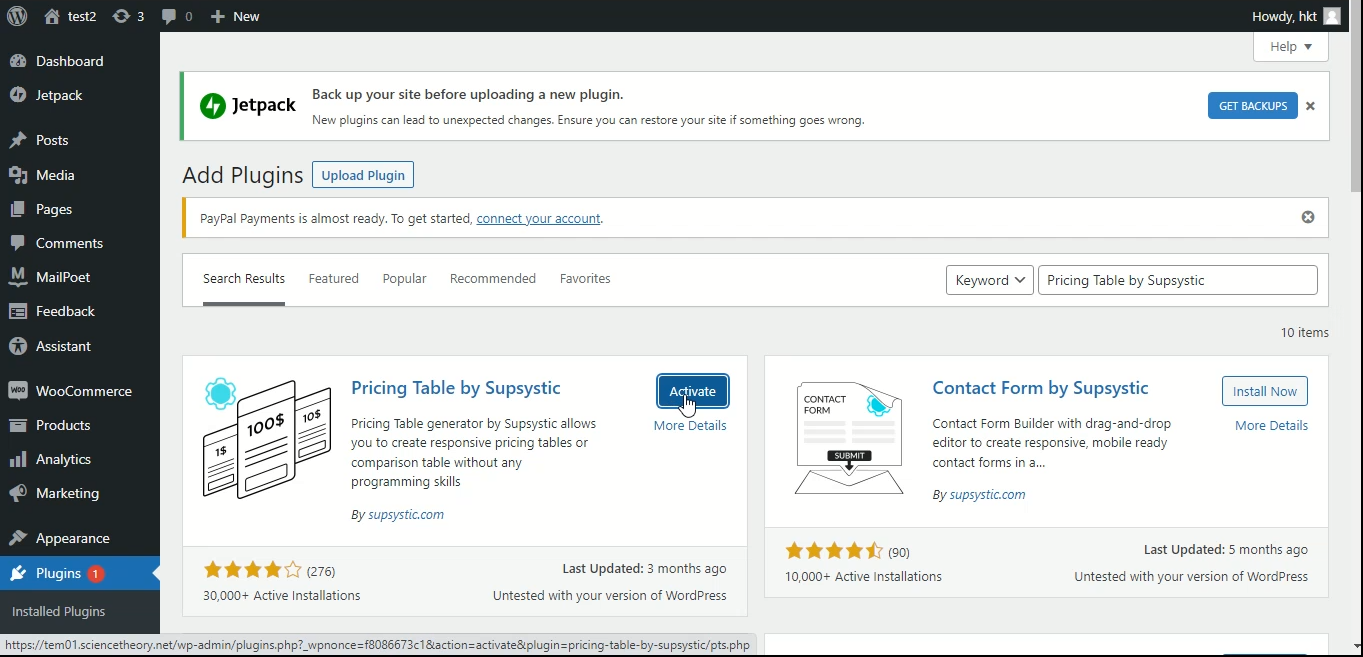
Once you have located the plugin, click the “Install Now” button.

When the plugin has been installed, click the “Activate” button.
2. Pricing Table Features
Once the installation is complete, follow these steps:

Step 1: Choose one of the pricing table templates
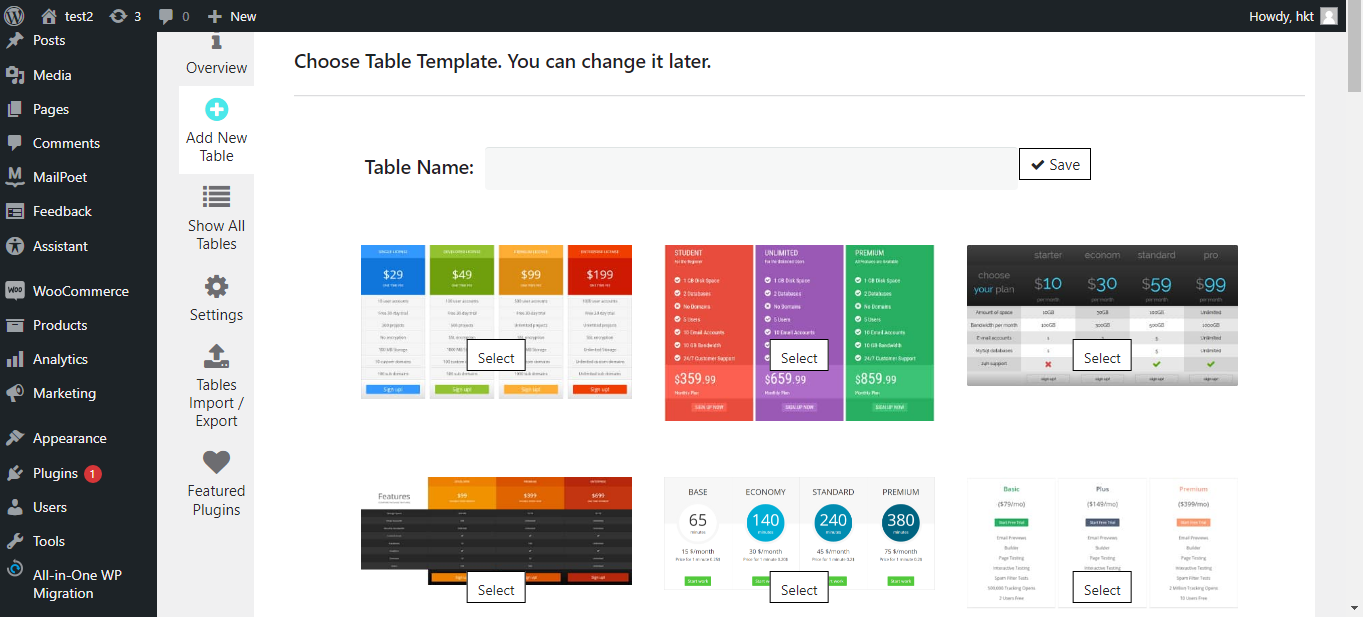
Pricing tables must be chosen very carefully so that visitors should get the information they would be interested in. Available features, options and costs available as well as refund. Price tables by Supsystic with nice templates and drag-and-drop builder are totally unique.
Step 2: Edit the content in the template

When you create your pricing table, it is good to consider the following points:
- Visually separate plans in pricing table by using alternating background colours. You can attract attention to the plan that you want to be bought by user.
- Utilize different price table font sizes and colours for elements you want to stand out: titles, prices plan, headlines, etc.
- Be aware that users scroll down long tables. Prices at the top of a pricing table might not be visible when they’ve reached the table bottom. One solution is to place prices both at the top and bottom, another – is to keep the pricing table short.
- In the pricing table user should carefully examine its portfolio and pick the most important features to present in its pricing plans. Visitors should be given only the information they would be interested in: available price features, options and costs. The rule of thumb is: every unnecessary cell in your pricing table increases the probability of losing potential customers, because you make it more difficult for them to compare various price plans and select the best one.
Step 3: Publish it on your website.
3. Add Pricing Table To The Post, Page Easily
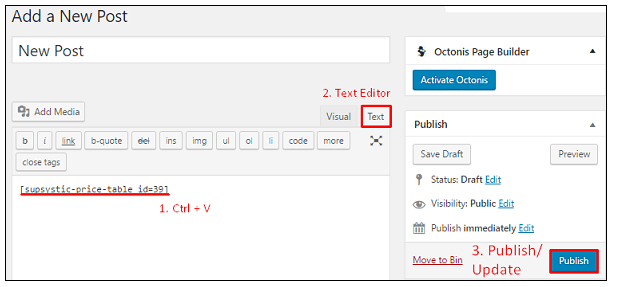
3.1. Shortcode
You can find short code of pricing table above it’s Main Settings.

Copy shortcode and paste it to your site content, then Pricing Table plugin will display the table you created on appropriate post/page using settings you tuned in this table.
3.2. Php Code
Choose PHP code in the dropdown menu and copy it.

In general php code can be inserted at any place of the page code – to display exactly in this place, for example in the header or footer of the page. Besides it can be inserted in the code of template of the theme – to display on all pages.