It’s often easier to make information available to visitors in the form of documents rather than trying to re-create the information on a web page. Plus, they have something to “take away” with all your contact information on it as well. So easily uploading and linking to documents is important, and WordPress enables you to do this.
1. Uploading And Inserting A Document
A common type of document on a website is a press release. I’ve created a Category for Island Travel press releases and added a Post about a new destination being added to the travel roster, so now I’m going to add the PDF of the press release.
1.1. Linking Text to Documents
I begin by placing my cursor where I want the link to appear in my text and then clicking Add Media.
In this case, I’m adding the PDF from my computer, so I use the Upload Files tab of the Media Uploader window. When the upload is complete, my document is highlighted in the Media Library, and the Attachment Details are on the right side, as shown in Figure 1.
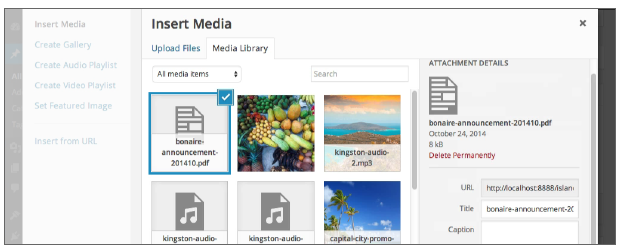
FIGURE 1
The key to inserting documents is to remember that WordPress uses the Title as the text linked to the document.
Now by default the Title is the name of the file, but even if you have a good descriptive filename, it still needs to be altered to fit the context of your content. You could, of course, change the link text later in the Content Editor, but it’s always a bit faster to do it from here. So in the Title field, put the text you want the visitor to read.
The only other thing to watch for when adding a document from your computer is to be sure the file’s U RL shows properly in the Link To setting of the Attachment Display Settings, as shown in Figure 2:
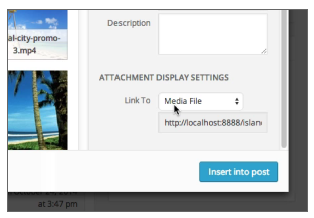
FIGURE 2
Remember, this area of the Media Uploader is often not visible, so be sure to scroll down. If, for some reason, it does not say Media File and show the URL of the document, just drop down the menu and choose Media File.
I’m now ready to click the Insert Into Post button. The link displays in the Content Editor, as shown in Figure 3.
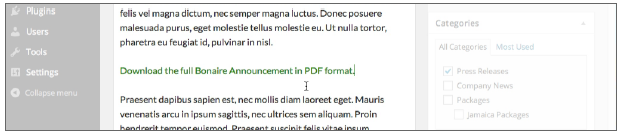
FIGURE 3
If the wording of the link isn’t right, you can, of course, change it in the Content Editor without going back and reinserting the document.
When you finish, remember to Update or Save Draft, or Publish.
1.2. Linking Images to Documents
There may be occasions in which you want people to click an image to download a document. Maybe you have a cool graphic to attract their attention to the download and you want the file to be accessed when they click the graphic.
Normally, when you insert an image, you either link it to itself or to nothing at all. But there is the option in the Media Uploader to link to a Custom URL, as shown in Figure 4.
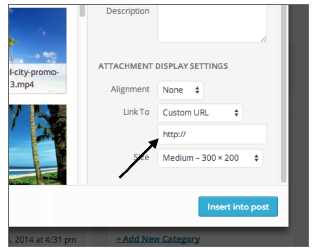
FIGURE 4
This is where you would paste the URL of your document after getting it from the file’s edit link in Media Library.
2. Document File Types
You can upload all sorts of document files into WordPress, such as PDFs, PowerPoint presentations, Word documents, spreadsheets, and so on, but you should always be guided by the needs of your visitors. They want material to be accessible and safe.
Do visitors have the program to open the file and can their version read the document?
My preference is to always post documents as PDFs if possible, because they’re universally accessible (most browsers today include a PDF reader) and visitors are sure to see the exact formatting and layout you created.
WordPress has a wide range of document file types that it enables, including most types of Microsoft Office files, OpenOffice formats, WordPerfect, and the Apple iWork format. If there’s a specialized file type that you’re having trouble with, there are plugins that enable you to change the allowed types. Some are mentioned at the end of this lesson.